Setting a PIN unlike a full-length password is more convenient to type and easier to remember while logging-in to your system. Thus introduction of this PIN code feature along with picture password is what has made Windows 10 OS more reliable in terms of security. Yes, indeed Microsoft never ceases to amaze its users with every new launch and updates.
But recently, with the Windows 10 Anniversary update, users are reportedly facing problems with adding PIN to their security measure during sign-in to their PCs. Well, the reasons for this abnormality are many and accordingly various methods are available to cope up with this problem.
This article would demonstrate few of those methods to figure out how to fix Windows 10 PIN not wWorking in Windows 10 after Anniversary Update. Continue reading the article:
Method #1: Reset Your PIN
If you have already got a PIN on your Windows 10 PC, but the PIN is not being working after you have done the Anniversary update, then the easiest method to fix the issue us to recreate or add a new PIN, but remove the previous PIN first. Go through the steps mentioned to reset a new PIN:
Step 1.Open the "Start" menu, and enter "Sign-in options".
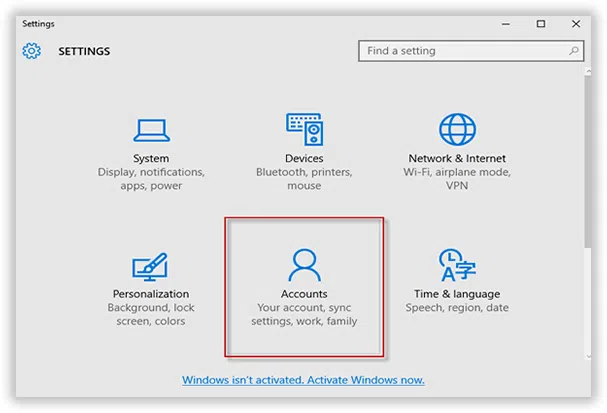
Step 2.Under the PIN section, you would find "Remove" option, if you already possess a PIN for your system.
Step 3.Click on "Remove" to remove the PIN.
Step 4.Now; click on "Add PIN" again to create a new PIN afresh.
NOTE: If you are about to set your Windows 10 PIN for the very first time, this method would not work as there is no PIN to remove before adding a new PIN.
Don't miss: How to Unlock Windows 10/8/7/XP Administrator Password without System Reinstallation
Method #2: Delete NGC Folder's Content
Here in this section we would try to enable the feature if it's not working by deleting certain files in a system folder, called NGC folder. Usually it comprises files which are responsible for system protection. When some of these files get corrupted, they interfere with the normal system performance. NGC folder by default is not allowed to be opened by the user until some changes are done to its properties. The method is given below in full elaboration:
Step 1. Sign-in using your Administrator password to get the admin privileges.
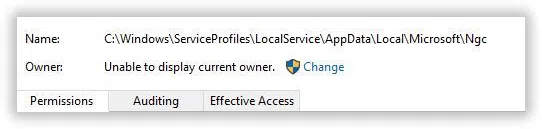
Step 2. Open "File Explorer" and browse to the following path:
C:\Windows\ServiceProfiles\LocalService\AppData\Local\Microsoft
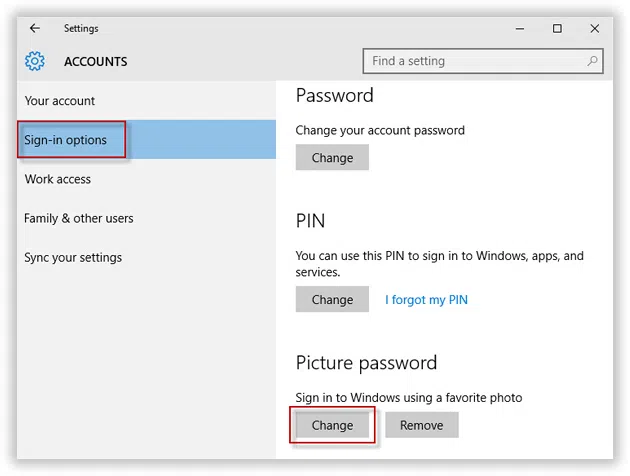
Step 3. Now; right-click on the NGC folder and from the drop down menu choose "Properties".
Step 4. Under the "Security" tab, select "Advanced" option.
Step 5. Adjacent to the "Owner" section, click on the "Change" link.
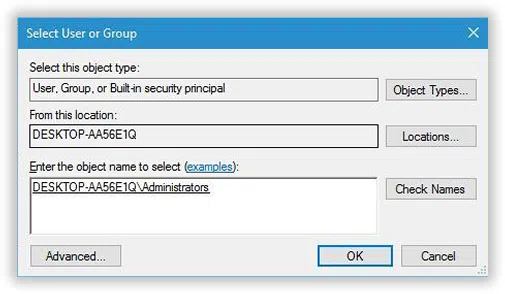
Step 6. In the "Enter the object name to select" field, enter "Administrator" depending upon the type of account you are currently using. Click on "Check names" and then "Ok".
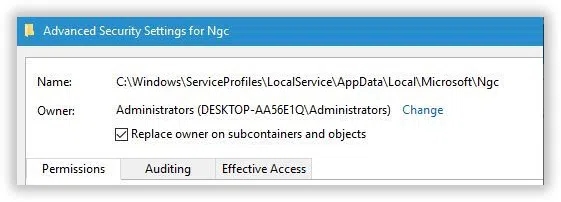
Step 7. Once you are done with this much, check the option "Replace owner on subcontainers and objects". Click on "Apply" and then "Ok".
Step 8. After you have followed all the aforementioned steps, you would now be able to open the NGC folder.
Step 9. So, now open the folder, and delete all the files and sub-folders.
Step 10. Add a PIN browsing to the following path: Settings app> Account Settings> Sign-in
Don't miss: How to remove sign in password from Windows 10
Method #3: Implement Policy Editor
Local Group Policy Editor is a feature of Windows OS which allows the user to edit local policies which are stored in the system. Here in this section, we would locate one such policy which can enable the PIN code security feature to function properly without any trouble. So this is what you have to follow:
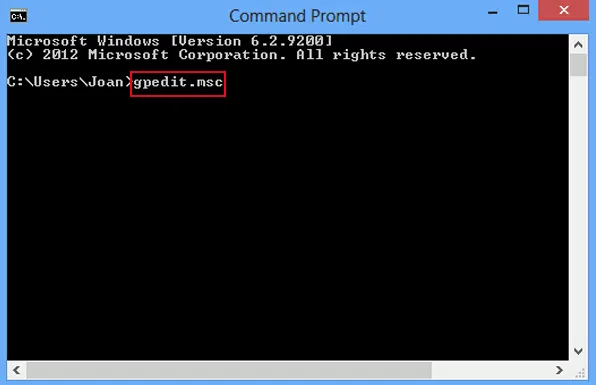
Step 1. Click on "Start" button and type "cmd" and from the results, right-click on the "cmd" option.
Step 2. Select "Run as administrator" option from the drop down menu to run it with admin privileges.
Step 3. Once the black box of command prompt appears, type gpedit.msc and press "Enter" to open "Local Group Policy Editor".
Step 4. Double-click on the "Computer configuration" and select "Administrative templates" from the left side of the panel.
Step 5. Again; double-click on "System" and "Logon" from the sub-menu.
Step 6. On the right-side of the panel, click on "Turn on PIN sign-in" policy.
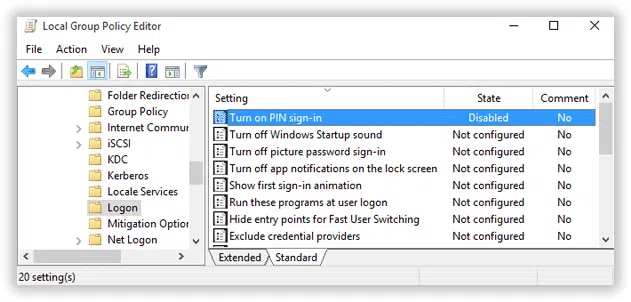
Step 7. Select "Enabled" from the chosen policy window.
These will brute force the feature to appear and this time you can set a new PIN as per your requirement.
Also read: How to Disable Lock Screen on Windows 10
Conclusion
Windows 10 is well equipped with enhanced, upgraded measures to secure access to your computer. Adding PIN to log-in page is one of them. Though adding PN is similar to log-in with Microsoft account, but the advantage of using a PIN instead of a Microsoft account password is that your Microsoft account can give you access to all devices configured with the same Microsoft account, whereas the PIN is device-specific. So if any user accidentally happens to see your PIN, at least he would not be able to open any other devices, which could have been possible if he had seen the Microsoft password. Moreover, remembering a 6 digit PIN is easier and more convenient.