Undoubtedly Windows 10 is geared up with all that an user would require for smooth functionality, but still many dysfunctional cases or errors have been reported lately by users across the world. One such issue includes the win x menu not working or appearing. Win X menu is the power menu in Windows 10 which turns up when you right-click on the Windows Start button or simply press Win key + X key combination.
Also read:
How to Change Windows 10 Password without Knowing Password?
How to Encrypt A Usb Flash Drive on Windows 10
As per the reports, the win x menu freezes intermittently, sometimes doesn't even open or its shortcut doesn't work at all. This article is intended to give you clear cut idea as to how to fix Win+ X mnue not working issue in no time.
Method #1: Add New Item to Win+X Menu
The greatest thing about Win X menu is that it can be customized as per the user's choice, though it might not be opening, but still the user has the liberty to fix it by adding a new item into the list. The following instructions would help you pull off the method:
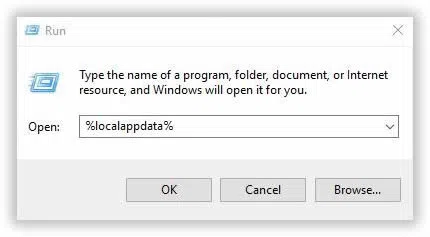
Step 1.From the home screen press "Windows logo key + R" to open the "Run" search box.
Step 2.In the blank dialog box, type "%localappdata%" and press "Ok".
Step 3.Now; go to the following location in your C/: drive: Microsoft\Windows\WinX
Step 4. Click on the folder in the Win X folder, you will get to see three Group folders.
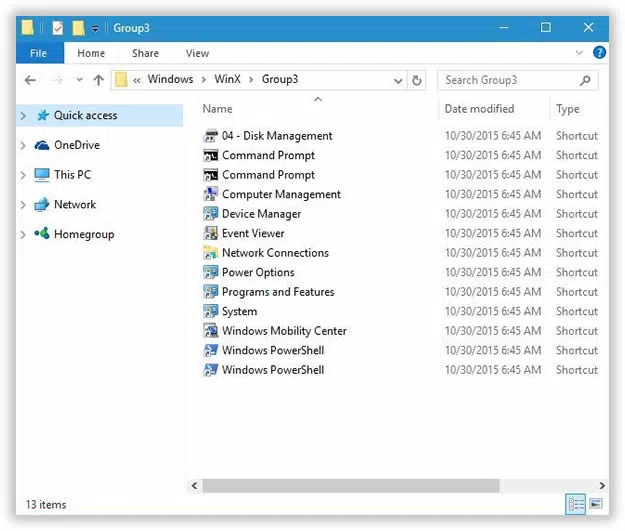
Step 5.Go to any one of them, and add a new shortcut to it.
Once you are done with this much, the Win X menu will automatically start working. If the method is not giving the appropriate results, switch over to the next method.
Also read: Command Prompt Has been Disabled by Administrator - How to Fix?
Method #2: Install New Language Pack
There are many methods which are still unknown to the users and can only be figured out by sudden attempts. You can also try to install new language pack to fix Windows X menu not working on Windows 10.
Step 1. Firstly, press "Windows logo key + I" key combination from the keyboard to open the Settings app.

Step 2. Move to the "Time & Language" section, and under the same section, Click on the "Region & language" option.
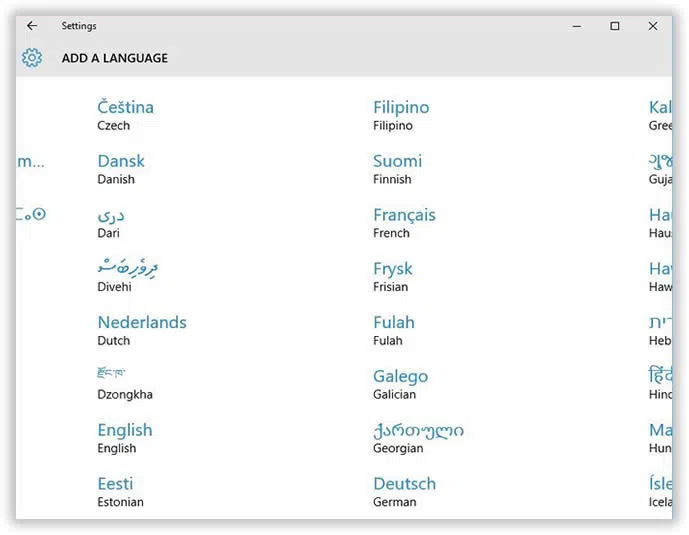
Step 3. Now; click on the "Add language" option under the label named "Languages".
Step 4. You will be directed to a page containing a list of languages from which you are supposed to select any one language pack as a new item for your Win X menu.
Step 5. Once the new language pack is successfully installed in your system, click on it to choose "set as default" option.
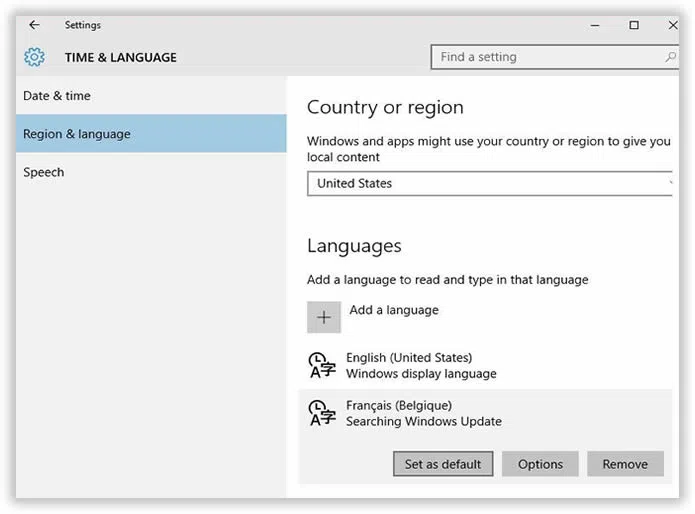
When clicking the "set as default" option, the display language will change to the new language you have set, and the Win X menu will be appearing without any disturbance.
Win X menu is quite handy to use and on its malfunctioning, the user may need to open the certain listed shortcuts manually from other locations. The methods mentioned here in this article would definitely fix Win+X menu not works on your Windows 10, but if you want to try out some other solutions, then you can check your registry to ensure that IsShortcut entry is available; or copy Win X folder from a Default user.
Even if you are a novice, if you follow the guidelines step by step given in the above article, the problem can be sorted out very easily.