
As a matter of fact, a computer system is a hub of many essential data or information which on being misused or exploited can really create a great fuss. Thus creating an administrator account on your PC with password protection would help you to secure your files and folders from the misuse.
But at times, the user happens to create more than one Admin account on a single system, and may wish to delete one of those admin accounts. Though deleting an admin account from the PC is as simple as deleting a standard user account, but you need to sign-in as an Administrator to delete the Administrator account. If you forgot administrator password in Windows 10, then it’s easy to reset Windows password with Windows Recovery pro tool.
It is recommended that while deleting an Administrator account it is better to create a backup of all the files and folders to a different location or a drive, because sometimes, the process of admin account deletion delete saved data off your system.
Now, this article would demonstrate you the ways to delete or remove Administrator Account in Windows 10.
Continue reading to know the methods in detail.
Method 1: Delete Admin Account on Windows 10 Using Control Panel
As you all know that control panel in an operating system is the main interface through which all the settings, necessary updates, modifications and many more essential tasks can be done. This method would employ the control panel here to do the task. Continue with the steps below to know them in detail:
Step 1.Turn on your PC first, and then go to “Control Panel”.
Step 2.You can click on “View by” icon to change the view to “Small icons”.
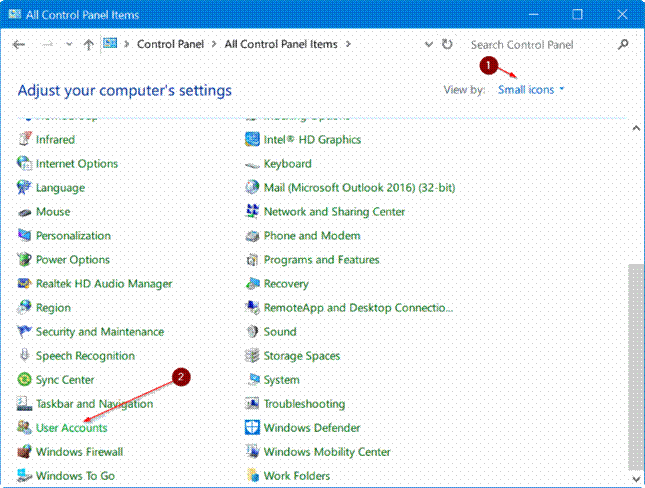
Step 3.After doing this click on “User accounts” section.
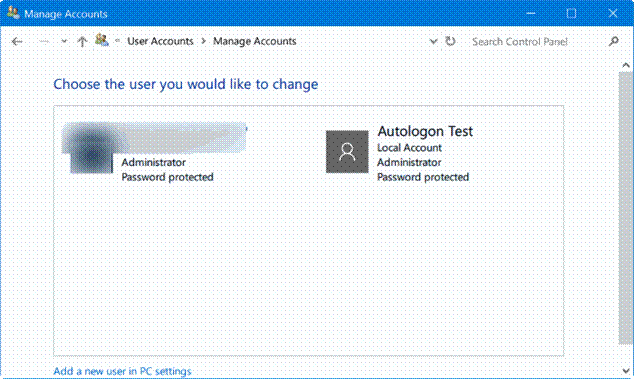
Step 4.Here click on the “Manage another account” link to see all the user accounts associated with the system.

Step 5.Now; click on the Admin account that you want to delete.
Step 6.Once you have done this, click on the “Delete the account” link.
Step 7.After clicking on the “Delete the account” link, another window would pop up showing a confirmation dialog, asking for your permission to either “Keep Files” or “Delete Files”. If you select “Keep Files”, then all your files and folders will remain intact within the account, but if you choose “Delete Files” the files will be deleted once and for all.

Also read: Enable and Disable Built-in Administrator Account on Windows 10
Method 2: Remove Administrator Account using Settings
This method would employ the settings app pre-installed in Windows 10 operating system. The method is quite simple and easier to put to use, just keep reading to know the steps given below:
Step 1.First open your PC and press the combination “Windows logo key + I” on the keyboard.
Step 2.Once the Settings app window appears, look for the “Accounts” tab and click on it.
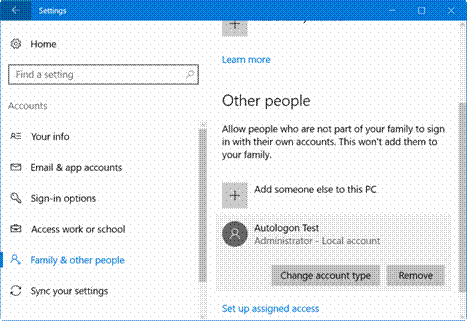
Step 3.After clicking on “Accounts” tab, choose “Family and other Accounts” and click on it.
NOTE: In case you are on Enterprise Edition of Windows 10, go to “Accounts” and then to “Other accounts” option.
Step 4.Here in this panel you can track all the admin accounts and the standard user accounts. Though the admin account you have signed in currently would not be shown in the list. That means, if you have got two admin accounts, say for example, “Smith” and “Robert”, you have to sign-in to “Smith” account to delete “Robert” account, and vice-versa.
Step 5.Click on the admin account that you want to delete.
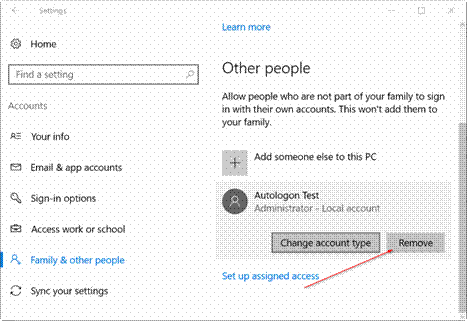
Step 6.After doing this click on “Remove” button afterwards.
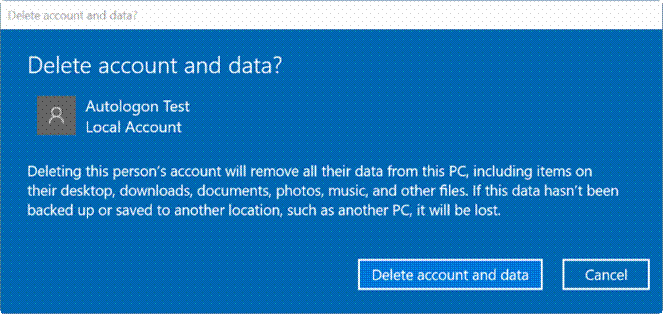
Step 7.Later on, when you get to see the following confirmation dialog given below in the image, click on “Delete account and data” to delete the account and all the data from the account.
Once you have completed all the steps as mentioned above, your admin account sign in icon would not appear any longer while turning on your system, then it means you’ve deleted admin account successfully!
Method 3: Changing the User Account Type
Unlike other methods mentioned above this method is quite simple and doesn’t require excess knowledge to do the task. Just follow the steps below and your job will be done.
Step 1.Turn on your PC and press “Windows logo key + R” together on the keyboard.
Step 2.Once the “Run” dialog box appears, type in the search field “netplwiz” hit “Enter”.
Step 3.On hitting “Enter”, the “User Accounts” window will pop up.
Step 4.From the “Users Accounts” window click on the “Properties” button.
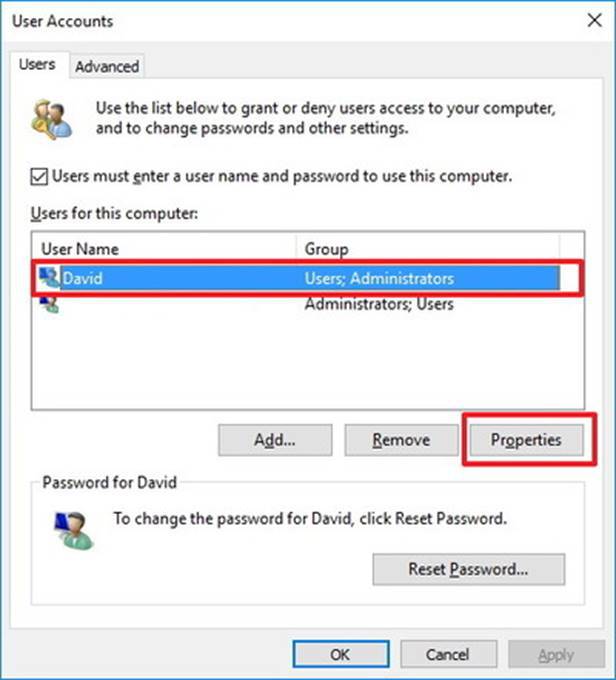
Step 5.On the following that appears with the name of your Admin account, select the “Group Membership” tab.
Step 6.Under the “Group Membership’ tab, select the account type to “Standard User” instead of “Administrator”.
Step 7.Click “Ok” after finishing the job.
Step 8.At last, click on “Apply” to save the changes you just made.
Conclusion:
Administrator account is one of the many alternatives available to safeguard your system settings from being exploited in Windows operating system. But one of the problems with deleting or disabling the feature is that you have to sign-in using your admin account to disable it. So in case you have forgotten your password, you would not be able to access the settings within to disable the password protection feature. In that case you first have to recover your Windows password and only then you shall be able to do the necessary changes in your PC for the admin accounts.
When you delete admin account on Windows 10, all the files and folders in this account will aslo be removed, so, it’s a good idea to back up all data from the account to another location. After backup, just follow the steps above to remove or delete administrator account in Windows 10.
Related Articles:


