Zipping a file actually reduces the size of the file and thereby makes the transportation of data easier via web. Incorporating a password protection to the ZIP file makes it more secure and reliable if the files you are transporting hold confidential information. So ZIP file is basically a widely used tool which is often utilized for compressing large sized files and documents with ZIP file extension. It is not restricted to scripts and folders alone but can compress software files as well.
This is the reason most of the softwares are available on ZIP file extension. The wide applications of this tool thus needs serious protection otherwise a greater extent of information compressed in a ZIP file can be misused if fallen in wrong hands.
Here in this article we would demonstrate few methods to create password protected ZIP file. Keep reading to know the methods in details.
Method #1: To Create Password Protected ZIP file in Windows XP
The ZIP file password protection feature is available on Windows XP, unlike Windows Vista or Windows 7 which do not include the feature. Thus at one point, XP is more convenient to add the password to your ZIP files. Follow the instructions below to know how to add the password to your compressed files:
Step 1. Turn on Windows XP PC, and locate the desired ZIP file from the My Computer or Windows explorer.
Step 2. Double-click the file to open it. Click "File" button from the menu bar.
Step 3. From the context menu that appears, click on "Add a Password" option.
Step 4. From the following pop up window, input your password twice for confirmation and then click "Ok".
Step 5. If you further wish to disable the password protection, simply go to the "File" option again, and choose "Remove Password" (Decryption) from the context menu.
The above mentioned method is only restricted to Windows XP operating system. Thus for windows 7 or later version, you may need to look at from a different angle.
Method 2: Make A Password Protected ZIP File with 7-Zip Utility
Unlike Windows XP, the later versions of Windows do not have the in-built feature to add password to ZIP files, therefore free third party file compression utility would be required. 7-Zip utility is one of those free file compression program that can easily encrypt a file with password at one go. Read the instructions below to add the password.
Step 1. Before you start with the procedure, make sure that you have the utility installed in your computer and choose the program wisely depending upon whether the OS is 32-bit or 64-bit.
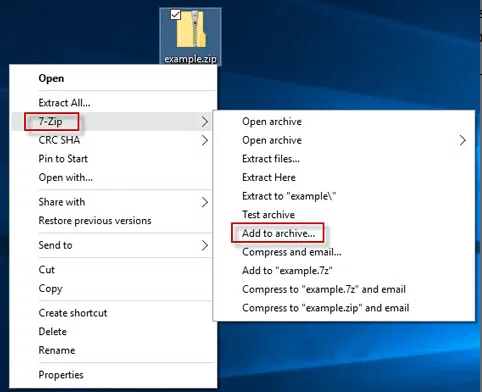
Step 2. Now; once you have completed this much, right click on the folder you want to compress into a password protected ZIP file.
Step 3. From the context menu, select "7-Zip" and then select "Add to archive".
Step 4. Now; in the "Add to archive" panel, type a name next to the archive section or prefer to keep its default name.
Step 5. Choose "zip" as the archive format.
Step 6. Go to the encryption box on the right hand side of the panel, and enter your password in the "Enter password" box and input it again in the "Re-enter password" box.
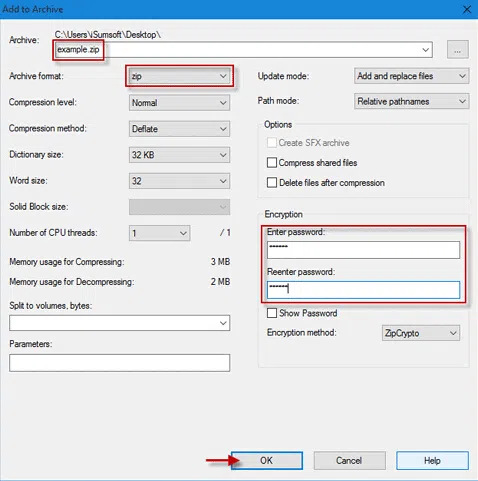
Step 7. After you have done this much, click "OK" to finish the procedure.
However, sometimes you may forgot your ZIP file password and locked out of your ZIP file, Even so, you can still has the chance to unlock your ZIP password without losing the original data. Just try ZIP password recovery tool.
Method 3: Password Protect Your ZIP File with WINRAR
WINRAR is another free utility which can create password protected ZIP files like the 7-Zip. Read below to know the method description.
Step 1.Make sure you have got WINRAR program properly installed in your system.
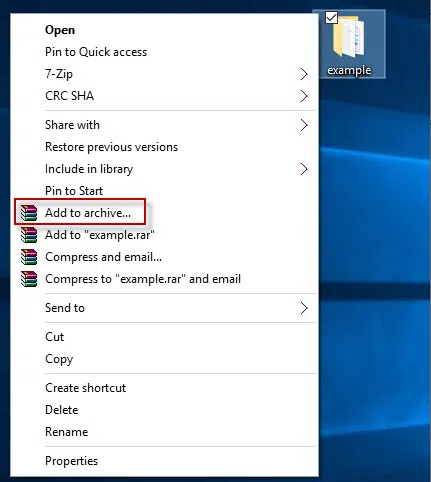
Step 2.Select the folder you want to password protect and right-click on it.
Step 3.From the sub-menu, click "Add to archive".
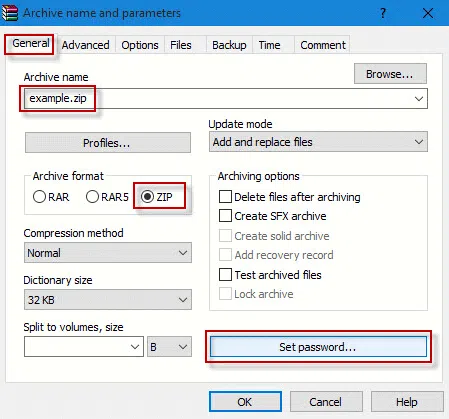
Step 4. From the following "Archive name and parameters" operating window, choose the "General" tab.
Step 5. Keep a name next to the archive section, or you can prefer the default name also. Select "zip" in the "Archive format" and then click on "Set password" button.
Step 6.You have to enter your password twice for confirmation and then click "OK" and then click "OK" again.
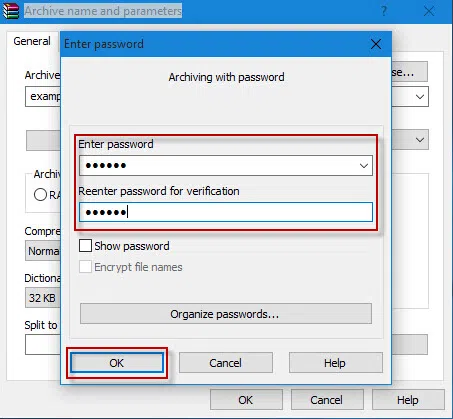
Once the password is set, you cannot open it unless the right password is entered by the user.
Large size files or softwares cannot be shared without compressing to smaller sizes. Thus most of the confidential data is transferred in the ZIP file extension. Hence such important files need to be password protected otherwise can be exploited. The main issue with password-protected zipped file is that anyone can still open the zipped file and can read the file names that they can easily search on internet and download it. It is true that they won't be able to open the file without entering the password but even if you know the name of the file then they can be easily searched on Google and information can be retrieved easily.