First you’d better understand what’s Windows Modules Installer Worker, it’s a windows update service that detects new updates online and automatically install the new update on your computer. Generally this service will run in the background while checking for updates. It would not take any of your system’s resources unnecessarily if it is not working.
Once all the updates are done, TiWorker.exe will free all your machine’s resources. But sometimes in Windows versions of 8.1 or above, especially in Windows 10, the service can use CPU, RAM or disk hugely. You may find Windows Module installer worker is constantly running with very high CPU usage which freeze all other application process of the system. It occupies CPU more than 90%. It causes consequently a slow system performance. Even when the Windows update is not running, TiWorker will clog all the system resources and makes them unusable.
Today’s article brings you few solutions that will help you diagnose or troubleshoot Windows Modules Installer Worker to rectify the problem.
Solution #1: Search for Windows Update Manually
The foremost part of dealing with Windows Modules Installer worker issue is to start updating your system manually instead of relying on this particular service. This reduced usage of this service will definitely free the CPU and RAM from some extra burden.
To check for updates in Window 8, 8.1 and 10, follow the step guidelines given below:
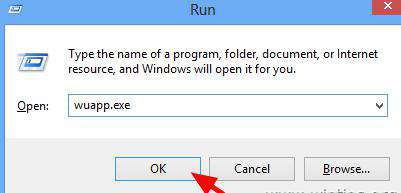
- Step 1. Use “Win + R” to bring the “Run” search panel.
- Step 2. Enter “wuapp.exe” in the search field and click “Ok” to continue.
- Step 3. Now on the “Windows update” page go to “Check for updates” option from it’s left side panel.
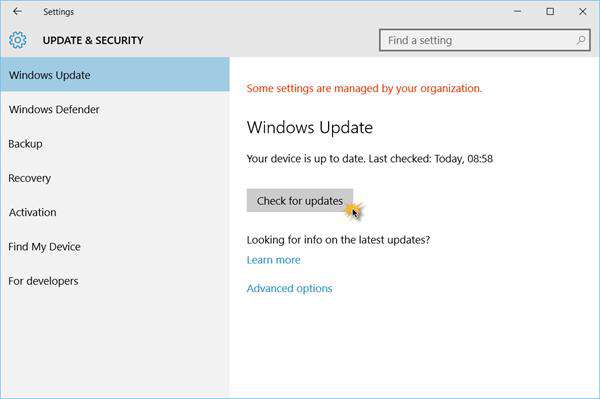
- Step 4. Install the updates shown available and reboot your computer to freshly apply them.
Solution #2: Delete SoftwareDistribution Folder
SoftwareDistribution folder is the Windows update folder. Here all the downloaded updates of Windows are stored. Now if any one of these files are corrupted or damages, Windows update will stop working. It will obstruct the Windows features and other updates or improvements which in turn will precede other issues, iandthe WMI worker high CPU usage trouble is one of them. Thus deleting the folder SoftwareDistribution which holds the damaged files if any, is one of the viable solution.
- Step 1. Use “Win + R” to bring “Run” search box.
- Step 2. Type in “services.msc” and hit “Enter”.
- Step 3. Locate “Windows service” windows, look for “Windows update” and then terminate it.
- Step 4. Now follow the C:Windows pathway and search “SoftwareDistribution” folder. Once you have found it, delete the entire folder.
- Step 5. Next restart your computer, check for updates manually like explained before, and install them if any available.
- Step 6. Reboot the computer one more time after the new update installations are done.
Solution #3: Try Running Windows Update and Troubleshooter
As recommended by Windows running Windows update troubleshooter will help you diagnose problems with Windows updates easily than ever before.
To get started, follow the steps below:
Step 1. Press “Win + X” keys together to open the “Control Panel”.
Step 2. Now in the “Control Panel” windows look for “Troubleshooting” option.
Step 3. Go to the left side panel and select “View all”.
Step 4. Now click on “Windows update” from the list of options shown and open it.
Step 5. Click on “Next” button and follow the onscreen instructions to fix the issue.
Solution #4: Try Running Windows System Maintenance Troubleshooter
Though by default, Windows always run Windows System Maintenance Troubleshooter in the background on a schedules basis for routine troubleshooting issues. If any issue is detected, it proactively notifies. Now in order to deal with TiWorker.exe issue if you need running Windows System Maintenance Troubleshooter manually, then better follow the steps shown below:
Step 1. Go to the “Control Panel” again like mentioned a while ago and choose again “Troubleshooting” option.
Step 2. Next choose “System Maintenance”.
Step 3. Now click on “Next” option and follow the instructions shown on screen to utilize system maintenance troubleshooter.
After the problems are detected and resolved by Maintenance troubleshooter, restart your computer.
Hopefully the problem would seem to be resolved.
Solution #5: Scan and Fix Corrupted System Files
Most of the times, damaged and corrupted files are the real cause of high resource usage problem. Now here in this section we would make use of SFC command (Scan and Fix Corrupted System files) in command prompt to reduce the CPU usage.
Step 1. Press “Windows + X” and then choose “Command prompt” with admin rights.
Step 2. Click “Yes” on UAC prompt box.
Step 3. As soon as the cmd black dialogue box would pop up, enter the following command and hit “Enter”:
sfc /scannow
Instantly the scanning process would begin, and once it is completed, reboot your computer.
Now once more check if the TiWorker.exe is still using a lot of system resources.
Conclusion:
If none of these methods seem to work in your favor, you can also set the TiWorker .exe priority level to low. That way, the system resources usage will be reduced and your system will start working at a faster rate. You can do this from “Task Manager” “Details” tab section.


