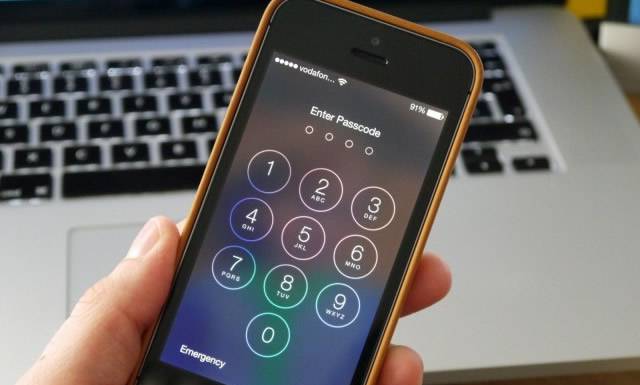
When you have paid a lot of bucks to purchase your iDevice, such as that of an iPhone, you would definitely wish to fortify it with every possible means. There are many ways through which you can protect your device from falling into the wrong hands of strangers and trespassers, be it pattern lock, password lock, face recognition etc. But since the dependence of our daily life has become so much riveted to passwords in every aspects, we are most likely to forget the password every now and then due to overburdening effect.
Now you have got an iPhone of your own, but you forgot screen password you had set previously for it, and you are locked out of your own device. It is next to your doomsday we presume. Well, there is nothing to worry. Little expertise of iDevices would enable you to know that there are many secret tricks and trades that can be implemented to bypass lock screen on your iPhone, iPad and iPod. Few of those methods are listed below.
Don’t miss: How to recover forgotten iTunes backup password
Method #1: Bypass iPhone Lock Screen with LockWiper
Unlocking an iPhone with LockerWiper is absolutely simply and safe. It works with all iOS versions like iOS 12/11.4/11.3 and other older versions flawlessly. Basically, it can resolve all kind of iOS issues that your device might be facing including resetting the forgotten password of the device when you sync it with the computer.
![]()
![]()
Step 1: Download the software (Windows and Mac Version), install it and then run it like a normal software. Next, get your iOS device connected with the PC and the software will give you the option to start.

Step 2: You will have to enable DFU on the iDevice. To perform that, press the power and home button together for few seconds then when the screen is turned on, leave the power button and keep holding the Home button for few seconds until and unless the DFU mode is enabled.

Step 3: Choose the firmware and download it. This process is automated by the software so once the downloading is started, just leave the program alone and let it finish by itself.
Step 4: After the process is completed, click the “Start to unlock” option and the pass lock from the iPhone will be erased.

As you can see bypassing the lock code and fixing the iOS related issues with this program is ultimately an easy operation. The steps are very straight-forward and only few clicks on the mouse is required to accomplish this. You do not have to factory reset the Device all the time to get the issues fixed rather use LockWiper software to get the job done quickly. It is free to try, so we will recommend to try this program yourself today.
Don’t miss: 4 Ways to Recover iPhone/iPad/iPod Screen Lock Passcode If Forgot
Method #2: Bypass iPhone Lock Screen with Siri (iOS 8.0 to iOS 10.1)
In case you are avid users of iPhones, then you must be aware of the use of speech recognition program called Siri, which not only follows your dictates but can be manipulated cunningly to bypass the lock screen. Read the instructions depicted in steps as follows:
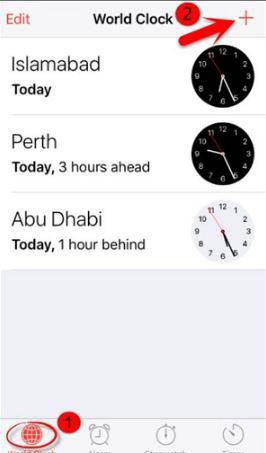
Step 1. Firstly, hold the “Home” button for a moment to activate Siri and ask any random questions off it for instance, “What time is it Siri?” and the program would display the time with a clock. Tap on the clock icon.
Step 2. You will be directed to an interface with world clock features. Add another clock from here.
Step 3. Choose any random text input while looking for a city, and then select the “Select all” button.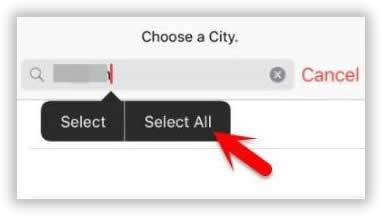
Step 4. Now, from the sub-sections, select “Share” button to continue.
Step 5. From the new followed window tap on the “Message” icon to draft a new message.

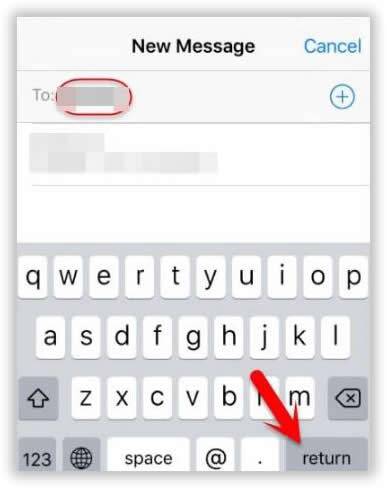
Step 6. A new interface window would turn up for new draft messages. Type whatever you like in the “To” field and tap the “Return” button at the bottom right corner of the screen.
Step 7. Tap on the “add icon” and your text turns green.
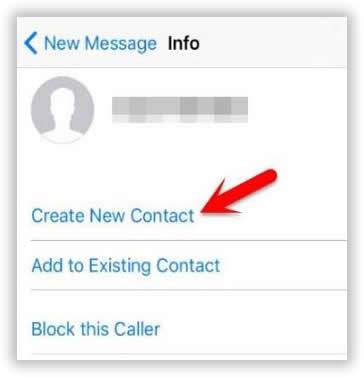
Step 8. Off the newly followed window, select the “Create New Contact” button.
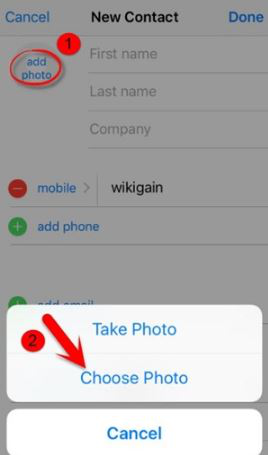
Step 9. Tap on the “Add photo” icon while creating a new contact to add a photo.
Step 10. From the photo library, choose any photo you wish to add.
Step 11. Once you are done with all the aforementioned steps wait for about 3-5 minutes, and then press the “Home” button which will lead you to the Home screen of your device, and you can see the lock screen interface is not shown any longer as you have bypassed it.
Also read: How to extract content from iTunes backup
Method #2: Bypass iPhone Lock Screen with iTunes
The most effective way to bypass iPhone Passcode is by utilizing the iTunes. Although, the technique would eradicate all the data off your device, but you can restore after the device is bypassed if you have created a backup of all the contents. So this is what you have got to do:
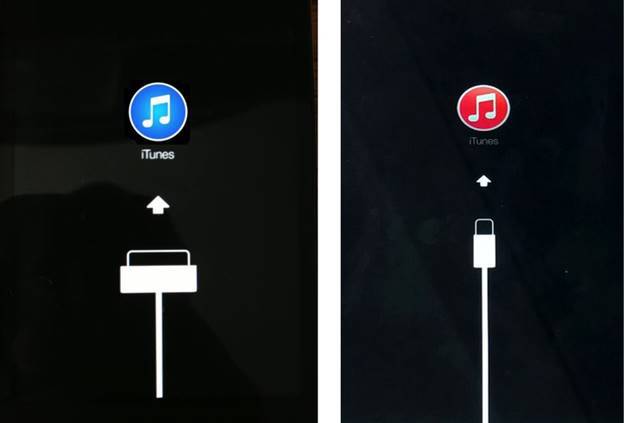
Step 1. Firstly, launch iTunes on your system and connect it to USB cable.
Step 2. Hold the “Home” button tight and connect the USB cable at the same time to your iPhone. It will display the connect-to-iPhone icon.

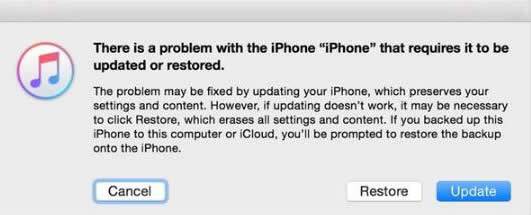
Step 3. Once you have connected your iPhone to your system, it will recognize the incorporation and will display the following message. Just click “Restore” button.
Step 4. Now, go to iTunes “Summary” category, and click on “Restore backup” button.
Step 5. Simply agree with all the terms and conditions and remove all the previous content on your phone.
Step 6. Now try to access your iPhone, it is found to have been bypassed without your knowing. Such is the splendor of iTunes.
Conclusion:
Forgetting your Passcode for your iPhone lock screen is a dreading scenario where if you fail to access your device, it may cost you heavily. The above mentioned methods are quite easy to implement, but in case you find it difficult to follow, you can directly take your device to the nearest Apple service center in order to prevent any further damage.
Related Articles: