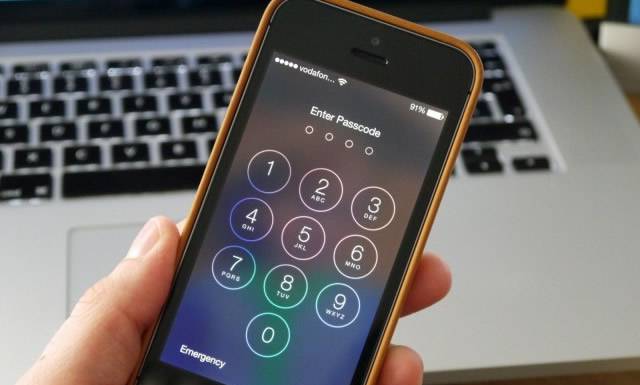
If you are planning to sell or giveaway your iPhone to any strangers then first, make sure to do two things –
- Backup the entire iPhone and its data.
- Erase everything from iPhone.
Backup is necessary because you don’t really want to erase every file out of your life but rather you just want them out of your iPhone. Therefore, you must back up all data from your iPhone especially, contacts, messages, personal chats, notes, media library, pictures and any other personal assets. Second thing is erasing everything from your iPhone because you don’t want the new owner to find out the contacts, pictures, messages, private files, etc. that are deeply your personal assets of your life. Hence, it should maintain the privacy of your own information.
Another reason to delete files from your iPhone is running out of low space. If your iPhone is cluttered with overloaded files then your iPhone may perform slower and thus, you need to clear your iPhone immediately to restore its fast performance. Despite what reason you have to erase data from iPhone, in this article, we are going to show you some easiest ways to accomplish that. So assuming you have backed up the iPhone and ready to erase everything from the iPhone permanently. If not, then follow the below guidelines to back up the data first.
Part 1. Backup Your iPhone to iCloud or iTunes before Erasing
Technically, whenever you plug in the iPhone to a power source or Wi-Fi then the device automatically creates an iCloud Backup. Likewise, whenever you connect the iPhone to PC, iTunes will automatically perform a backup of your device.
However, to make sure that you have the latest backup of your iPhone, perform the following steps if you are using iCloud.
Back up iPhone Data on iCloud or iTunes
Connect your iPhone with a stable Wi-Fi connection then tap on “Settings” followed by “iCloud” and finally, tap on “Back Up Now”.
On the other hand, if you are using iTunes then connect the iPhone to PC then launch the iTunes program on your computer.
Now, click on “Summary” then choose “Back Up Now” (Located beneath the “Manually Back Up and Restore” section.
Part 2. Erase everything from iPhone by Factory Resetting (Temporary Solution)
The reason why you should factory reset the iPhone is because it will delete 100% data from your iPhone. However, it is a temporary solution and you should keep in mind that these erased data is easily recoverable.
Preparations –
Before starting a factory reset, make sure to log out from iCloud, App Store, iMessages, iTunes or any other social networks. This is to make sure nothing is deleted that are stored online.
Procedure to perform a Factory Reset on iPhone –
Step 1. Tap on “Settings” of your iPhone.
Step 2. Select “General” and scroll down to the bottom to find “Reset” button.
Step 3. Tap on “Erase All Contents and Settings”.
Within few minutes all the data from your iPhone will be deleted.
If you have “Find My iPhone” enabled then you may have to enter the Apple login credentials to verify your ownership.
Limitations –
- This is a temporary deletion of your iPhone Data.
- Data recovery is possible.
- Not a recommended method if you are selling your iPhone to an unknown person.
- Data vulnerability is high.
Part 3. Erase Everything on iPhone with SafeWiper (Permanent Solution)
Whenever it comes to data privacy, we always recommend taking safety precautions first. As a result, you must erase the iPhone data permanently before getting rid of your device. Trust me, it will cause a lot stress release as no data can be exploited from your phone. In this part, we will be using a professional and effective iPhone Data Wiper to erase all the data from your iPhone beyond recovery.
iPhone Data Eraser not only erases the iPhone data but it totally overwrites the original content with garbage files so that no one can even restore the previous data. Even if someone tries a strong data recovery software then they will only be able to retrieve some useless contents that doesn’t belong to you or reveal your true identity. For sure, once the data was erased by SafeWiper can never be recovered and there will be no footprints or traces of the private files. It offers 4 powerful ways to erase everything from iPhone device which includes deleting personal messages, pictures, call logs, contacts, music, videos and any other data format from your device.
Warning: Please perform the data back up before using this software. There is no way to recover data once the iPhone Data Eraser wipes them.
Erasing iPhone Data with SafeWiper (The Procedure)
Step 1. Download SafeWiper on your PC, install it and launch the program to see the following user interface.
Step 2. Connect iPhone to the PC and the tool will detect it automatically.
Hint: You may have to accept the permission on the iPhone if it is your first time.
Step 3: Click on “Erase all Data” from the sidebar and then choose “Erase”.
Note: It may take several minutes depending on how much data you have stored in the iPhone.
At this point leave the PC alone and it will get the task done in no time.
After the erasing progress is finished, you may check the iPhone and it should be clean as new. You may try to recover the data using any data recovery tool but it is assured no data from your phone will show up.
Final Thoughts –
Remember that all data in unrecoverable that are erased by SafeWiper. It ensures that all footprints of your information is 100% wiped from the iPhone. And, we cannot stress this enough but backing up your data before using these methods is #1 priority. In case, you want to recover the data of your iPhone, you can always connect the device to iCloud or iTunes and restore all the files safely.


