Is't it frustrating when you are trying to update any software or program in your Android device, and the notification pops up with "insufficient storage available" tagline? Well, you are not the only one facing this ordeal. The problem basically lies not with your device, but certain locations within your device which has been preoccupied by unnecessary contents which are commonly called as Cache memory.
The methods explained here mainly focus on the deletion process of cache memory. So all you need to do is to access those locations from where you can delete this garbage files once and for all. You can also see other methods below.
Part 1: How Cache Memory Occupies Valuable Space in Your Android Storage?
Whenever you try to log in to any certain websites, you enter your login details, such as usernames, and passwords which are essentially remembered by the Mobile browser you are using. The details are stored in your device in the form of cache memory, so the next time you visit those websites, the details are retrieved from the cache memory as you don't have to enter them again.
Similarly, when any application is closed from your home screen, it still runs in the background, or gets automatically updated at its designated time. Cache memory helps these tasks to accomplish. Therefore deletion of cache memory is all that you need to do in order to regain the unnecessary filled storage space.
Don't Miss: How to Bypass Android's Lock Screen Pattern, PIN or Password If Forgot
Part 2: Clearing App Cache one at A Time
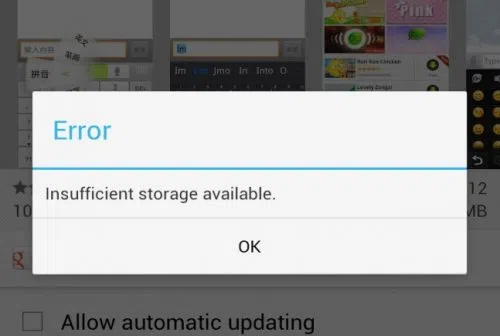
To fix "insufficient storage available" on your Android phone, you can easily clear some unused apps or app cache on your device, because the applications which are being run in your device currently take the valuable space by their cache data. In this method we would clear the app cache for each app one at a time.
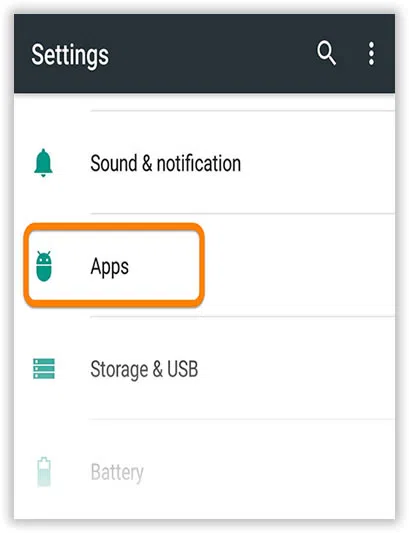
Step 1.Open your Android device and go to "System settings".
Step 2.Tap on the "Apps" option to select it.
Step 3.From the new window so obtained, scroll down the download section of the "Apps" tab.
Step 4.Tap on any particular app to delete its cache.
Step 5. With the screen of the respective app that you have selected, tap on the "Clear Cache" option to free up the space.
WARNING: Don't tap on the "Clear Data" option as it would delete the important files of the application from your device along with the cache.
Step 6.Repeat the steps for each app, which will keep on increasing the free space and the error would not appear any longer.
Part 3: Implementing App Cache Cleaner
In this method we would use App Cache Cleaner applications to clear the App Cache which is a more convenient method than the previous one.
Step 1. Before beginning with this method, make sure you have downloaded this app in your Android device and have installed it properly.
Step 2. After installing the app successfully; open it in your device.
Step 3. The app would start scanning the entire application lists of your device and alongside would exhibit the cache collection because of these apps.
Step 4. You will be available with two options, one "System Cache" and "Residual Files". Swipe left or right according to your situation to "System Cache" tab.

Step 5. Under this tab, all the system cache due to installed apps in your Android device would be shown clearly.
Step 6. Simply tap on "Clear" button to clear the app caches.
WARNING: Don't delete any files from the "Residual Files" tab, for it would delete essential files from your Android device.
Also read: How to Unlock Android Phones with A Broken Screen
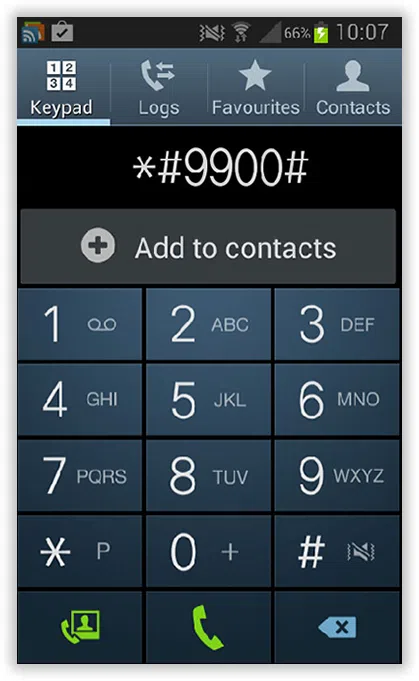
Part 3: Dial *#9900# from your Android Device
This method is the easiest of all the methods mentioned above. It doesn't require any hectic procedures to follow or any applications to run which in turn brings more troubles than any solutions. The simple guidelines are given below in steps:
Step 1.Open your Android device and go to the "Keypad" section of the phone where you type phone numbers for calling.
Step 2.From this phone dialer, type "*#9900#" and tap on "Call".
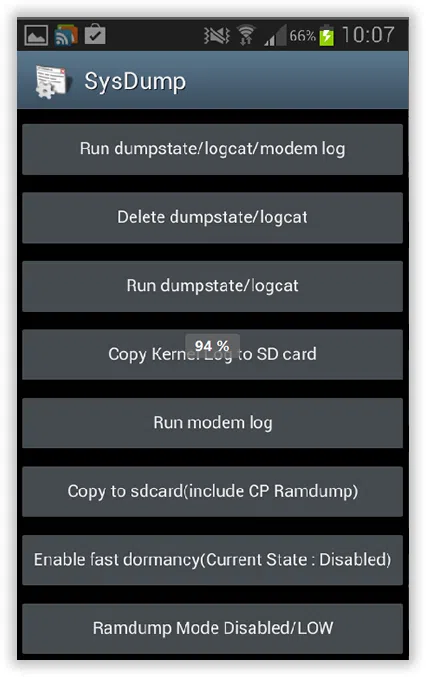
Step 3.This will open up a menu with many options enlisted. Choose the second one named "Delete dumpstat/logcat" and tap on it.
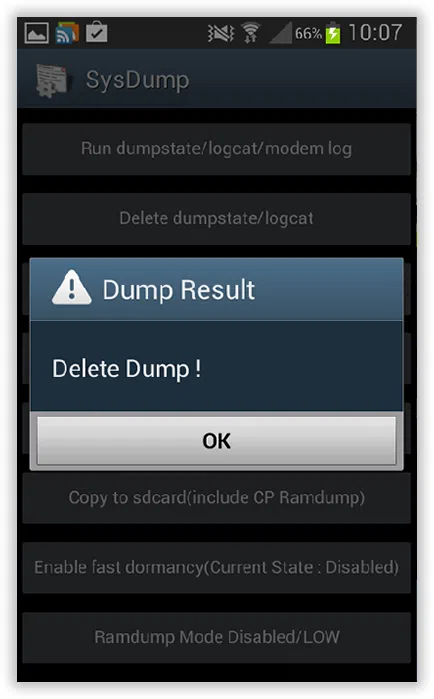
Step 4.Now, simply tap on the "Ok" button and your job is done.
Conclusion
"Insufficient storage available" error on Android is usually an irritating problem which does not allow the user to download any new file of relatively larger size or to update any of the applications pre-installed in your Android device.
But as explained before, accumulation of cache memory sums up the main problem and their deletion is all that the user should take into account. Although at times, the deletion of cache memory also fails to fulfill the requirement of fixing the aforementioned issue. In such cases, simply uninstall few applications which you do not use so often. The un-installation of the applications too would give you the relief and a lot of memory space can again be reclaimed on your Android Device.