There must be times when you are in the middle of some important involvement with certain tasks on your computer; or you are conversing with someone on webcam, and you wish to keep a recording of whatever you perform or say during the period. It is not usually possible in Windows to record literally anything you want, thus you need some external help, the help of third party Windows PC recorders.
There are plenty of freeware recorders available on internet market, but you need to be sure of the best amongst them before you start recording anything. The reason is quite simple, to avoid any intermittent interference in between the recording. The article here will describe you few such freeware PC recorders popularly preferred in 2018 in details including their working procedures.
#1: OBS Studio
OBS Studio is a completely freeware open source program, which is famous for webcam recordings, screen recordings, live stream videos, etc. It is available for both Windows and Mac, but first you need a step by step guidance to put it to use:
Step 1. Download the tool from the internet and install it. You also might need to install the additional run time components, which too should be downloaded from the page web browser opens up for you. After this, re install the OBS tool once again.
Step 2. When the tool opens, stick to “Automatic configuration wizard” and leave the checkbox “Optimize just for recording” to allow live stream video recording as well. Click “Next” to continue.
Step 3. You can create different scenes panels, to switch between them. At the bottom of the screen, click on “Sources panel” to mention what you exactly record.
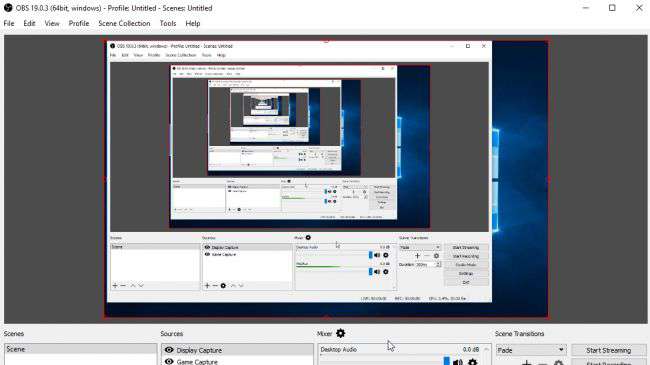
Step 4. You will get two options to follow up. Display capture to start recording whatever is happening on your screen and Game capture to start recording only when you launch an application full screen.
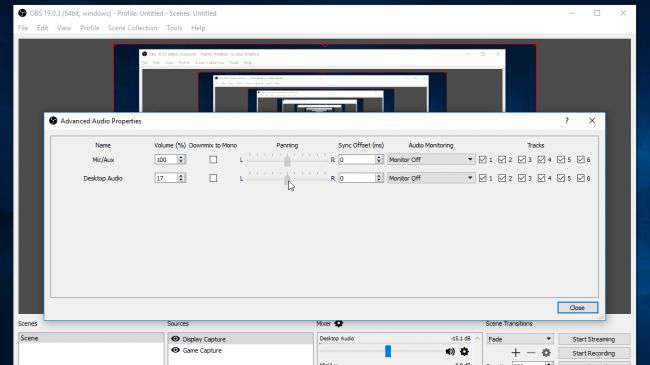
Step 5. You can choose your sound source, and volume.
CONS:
- The setup of settings before recording anything takes time.
- Difficult for beginners.
#2: BB Flashback Express
BB Flashback Express is freeware Windows PC recording tool. It can be used with Windows XP/ Vista/ 7/ 8/ 10. But you first you need to register for the free license, nothing to pay additionally. Once you have the license in your hand, you can now use it.

This is how you can use it:
Step 1. Download the tool from internet and get the free license by registration.
Step 2. Install the tool and then run it properly.
Step 3. Choose what you want to record from “Record” option and tick “Microphone (High Definition Audio) “and “Default PC Speakers”. If you wish to record webcam tick the “Record webcam” option. And finally click on “Record”.
Step 4. After the recording is done, choose “AVI CODEC” that is the video codec format options and click “Ok”. You can also click on “Apply effects” to add some additional effects after the recording is done.
CONS:
- It is not compatible for Mac.
- You cannot edit or add annotations to the recorded videos.
#3: TunesBro ScreenGeeker
TunesBro ScreenGeeker can record computer’s screens while doing your job, playing games, webcam conversation with external microphone and system sound settings. It can also capture HD quality pictures. Before you start using it, check out the following features of this tool to make your experience more furnished.
Tool’s Key Features:
- It is 100% free.
- No Plugins required.
- It is compatible with Windows XP/ Vista/ 7/ 8/ 10.
- You can capture all kind of recordings.
- It has got an additional “Around Mouse” feature which enables the user to record the surrounding areas of the mouse when it moves.
- You can record external sound and system video both simultaneously.
- Very easy to use for computer novices.
User Guide:
Step 1. Download the tool from its official website, and install with Windows installation Wizard.
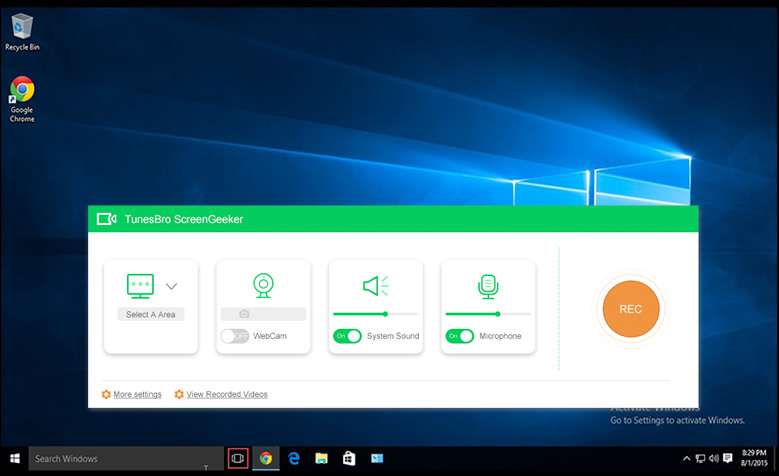
Step 2. Run the tool, and you will see a small rectangular operating Window emerge out of the blue. Yes this is the actual tool interface.
Step 3. If you wish to record your screen, click on “Screen Area” and then “Select a recording area” from the drop down menu.
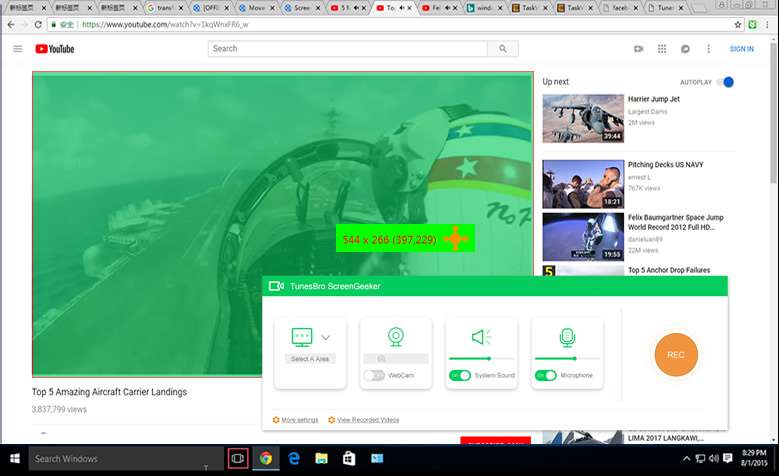
Step 4. Drag the portion of the screen that you want to record. And then agree to save the captured video. This will start generating the video to save in your computer.
Step 5. Click on “System Sound” or “Microphone” to toggle them on as per your requirement, and if you don’t wish to record audio with your videos then toggle them off.
Conclusion:
The tools mentioned above are all the most popular PC recording tools of 2018. You can choose any one of them and start using it right now, but since you can clearly that the first two tools have got certain shortcomings, thus it is better to rely on TunesBro ScreenGeeker if you are looking for something promising and reliable.
Always use external microphone while recording videos to get a clearer sound addition to your captured videos.


