
The best specification of Linux OS is that it can begin its distribution directly from a USB/CD/VD without actually damaging the system, its hard drive and additional operating systems in it. So basically you don’t need to do complete installation all the time to try out Linux in real sense.
But still, if you have decided to try it, for instance Arch Linux OS individually or in juxtaposition with Windows OS, then possessing a Linux bootable USB is a more secured and quicker solution.
Usually people try it on systems installed with Linux based OS. But here in this article, we will show two ways to create Arch bootable USB on Windows OS, and also one way to do the same in Linux. Just make sure that you have the Arch Linux ISO file, since that’s the only requirement for now. The rest is upto the article help coming your way.
Without a further ado, read ahead and learn what to do exactly.
#1: Create Arch Linux Bootable USB on Windows with Rufus Tool
There are many tools to do the job, but we have specifically selected two for Windows platform. One of them is Rufus. It is very popular, faster and more reliable than anything you get.
Step 1. Download Rufus to your Windows PC from the following link:
Step 2. You don’t have to install it separately. Just click on the downloaded file and it will open up.
Step 3. Connect a blank USB drive with minimum of 2 GB storage. Make sure you have got all its contents backed up if it is not empty, since you are going to lose them all during the procedure.
Step 4. Click on “Device” box, and ensure the required drive is chosen.
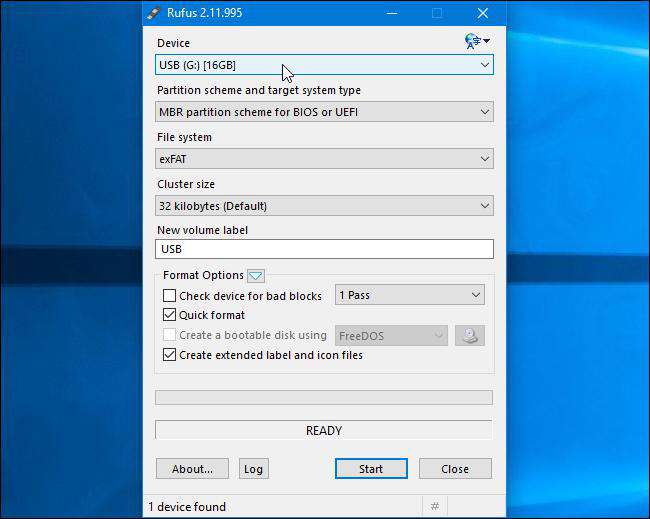
Step 5. If you find the “Create a bootable disk using” option grayed out, that means you have to go to the “File System” tab and choose “FAT32” option.
Step 6. Once the “Create a bootable disk using” tab is visible in operation, check its checkbox.
Step 7. Click the button next to it to browse and load the downloaded Arch Linux ISO file.
Step 8. Once you are all done with this, click the “Start” button and the process will begin.
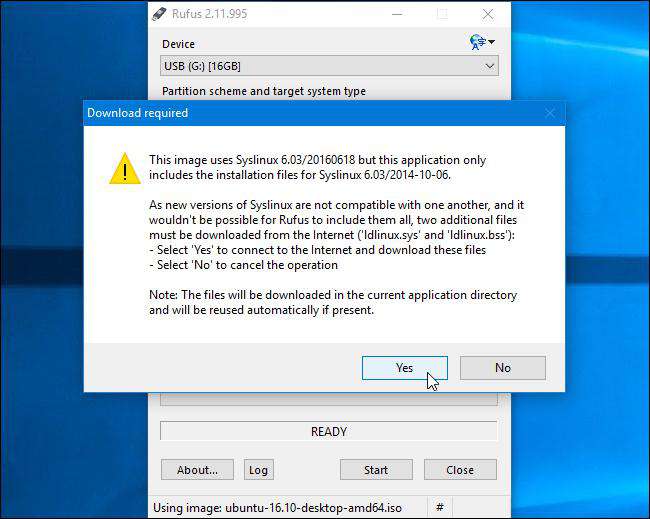
Step 9. In the meantime, you may get a prompt message suggesting to download a newer SysLinux file. Don’t worry about it. Just click “Yes” and the tool will do it by itself.
Step 10. Next, select “Write an ISO image (Recommended) option and click “Ok”.
Step 11. Click “Ok” one more time for the data lose warning notification and its done.
Not wait until the tool completes its job.
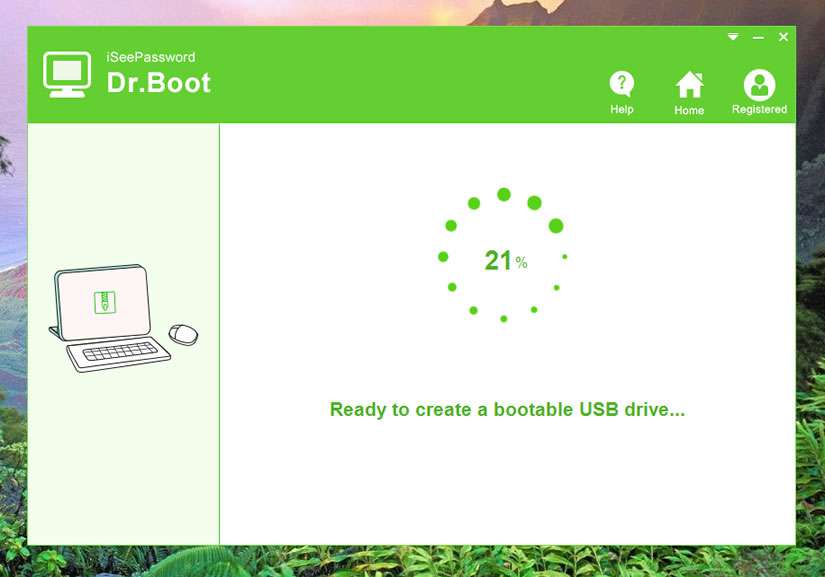
Create Arch Linux Bootable USB on Windows with Dr.Boot
If you want to try something, something much better and reliable than the last one on Windows Platform, iSeePassword Dr.Boot is worth a shot. It is practically programmed to create bootable disks for Windows, Mac, Linux OS. And it can be done on any platform. Since we are concerned about Arch Linux, on Windows OS, we will stick to that context. It is another popular and user-friendly tool for this purpose.
Steps to Use Dr.Boot to Create Arch Bootable USB
Step 1. Download, and install the Dr.Boot to the Windows computer where you need to install the Linux.
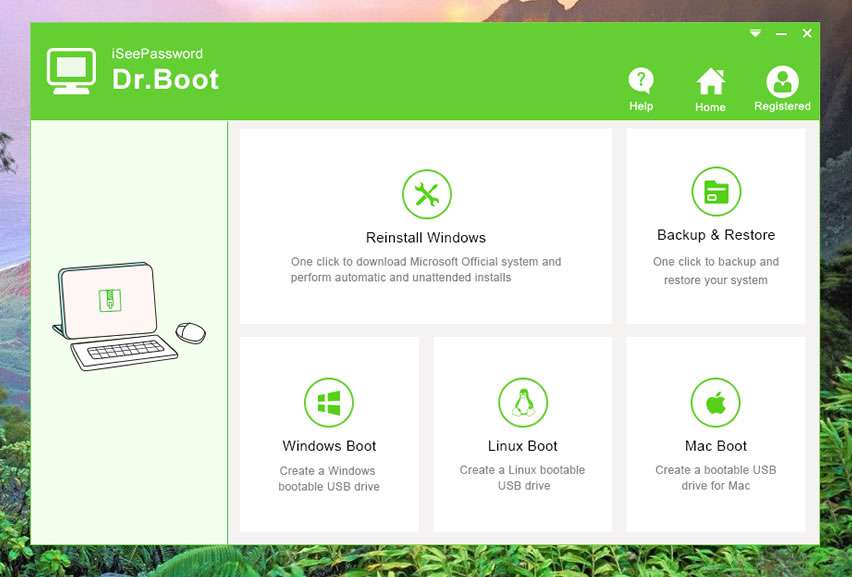
Step 2. From the tool main interface screen, select “Windows Boot”.
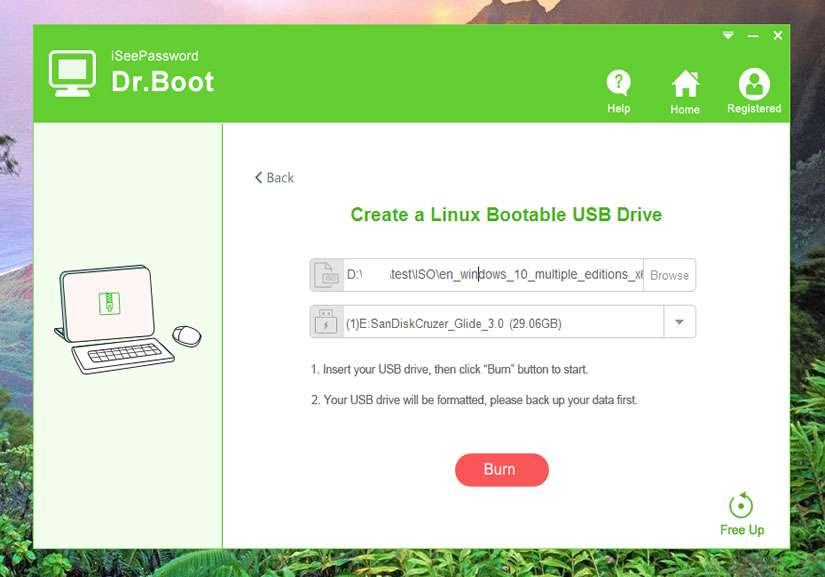
Step 3. On the following page, click “Browse” button to load the Linux ISO file. Select a file system beneath. And click on “Burn” button to begin the process.
While its being done, wait.
After creating a Arch bootable USB successfully, then you can insert this USB drive to your computer to install Arch linux now.
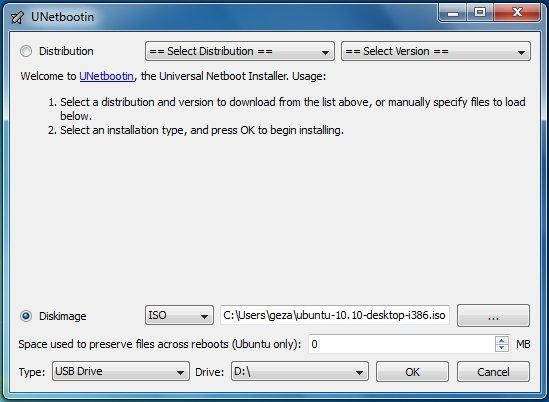
Create Arch Linux Bootable USB on Windows with UNETBOOTIN Tool
UNETBOOTIN shortly abbreviated for Universal Netboot installer, is intended to create bootable USB. This program is a cross platform for Windows, Linux, Mac OS. But as mentioned above, we will stick to Linux only on Windows platform.
It is an open source program, freely available on internet. So feel free to download.
Step 1. Download the tool from its official website.
Step 2. Just click the downloaded file and it will open up. You don’t need to install it separately.
Step 3. Click on the “Disk image” browsing button to load the Linux ISO file.
Step 4. When you are done, click “Ok” and the tool will take care of everything else.
Step 5. Once the process is over, click on the “Reboot Now” button from the next Window to reboot your computer.
In this article, all the methods are fully tested and reliable. But still, as per survey, iSeePassword Dr.Boot has proven to be very effective for most of the users. I have tried Dr.Boot many a times and it has perfectly suited my demands. Try it, or else you wouldn’t know what it can do.


