By default, Windows Update process happens in the background silently. Sometimes, you may update it manually. But, there are times when the Windows 7 would not update and get stuck on the update screen forever. It is important to keep Windows up to date as it patches many security issues and enhances the performance. While this could happen with any edition of Windows, it has been noticed that it is more common on the PCs running Windows 7 or Windows 8/8.1. If you have run into such a problem, here are some solutions for you.
Solution 1. Try Using Windows Update Troubleshooter
One of the very first things you will want to try in order to resolve the issue is use the Windows Update Troubleshooter. It is a tool built into almost all the versions of Windows OS and can fix many issues related to the updates. This method is easy to use and often fixes the problem without you having to try anything else. This tool first closes the Update services of Windows, clears the update cache, and restarts Update service afresh. Here is how you can use this tool:
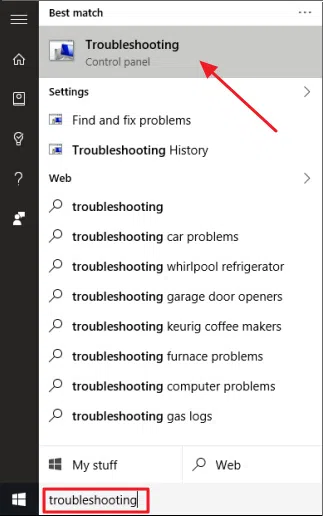
Step 1. Click the 'Start' Menu and type 'Troubleshooting'.
Step 2. Select the option in the search result as shown in the image below:
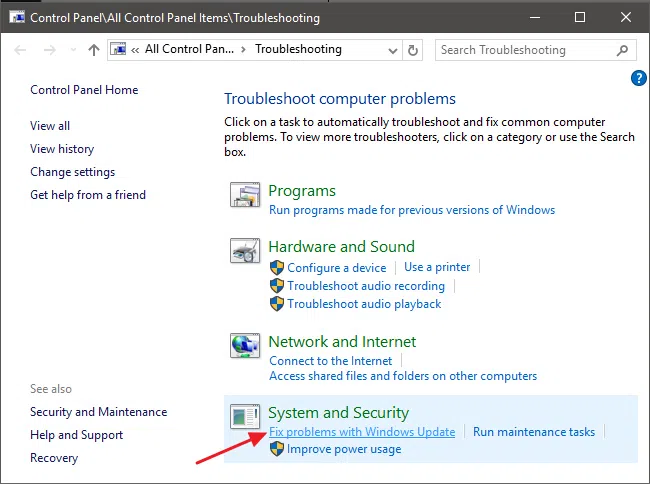
Step 3. It will launch the Control Panel of the Troubleshooter; Here you need to click 'Fix problems with Windows Update' in the section named 'System and Security'.
Step 4. Click Advanced on the next screen. On the next screen, ensure that the checkbox labelled 'Apply repairs automatically' is checked/enabled.
Step 5. Click on 'Run as administrator' (this will allow the Troubleshooter to delete the cache files), and click Next.

Allow the tool to run the course of the process. Once the process is complete, it will let you know whether the problem was identified and fixed. The Troubleshooter can resolve the issues most of the times. Run the Windows Update again to check if the issue has been fixed. If not, move on to the next solution.
NOTE: If you forgot Windows 10 login password, there is no need to reinstall or format your system, iSeePassword Windows Password Recovery tool can be able to bypass your Windows.
Solution 2: Try to Delete The Cache Manually
If you are still experiencing the issue, you may want to delete the download cache manually. This may seem counterintuitive but sometimes Troubleshooter is not able to clean all the files but you can do that manually. In order for this process to be effective, you will want to reboot Windows 7/8 in the Safe Mode. Logging in Safe Mode gives you more liberty than the Normal Mode.
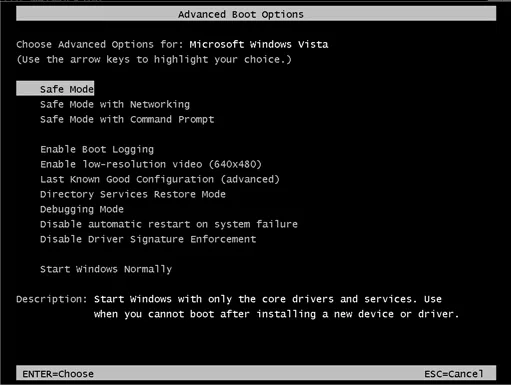
To boot in the safe mode, restart your PC and when it shuts down and just begins to restart, press the 'F8' key. You will see the following screen and you need to select 'Safe Mode'.
Now you need to disable the Update Service. Here is what you need to do:
Step 1. Click the Start Menu. Type 'Command Prompt' in the search box.
Step 2. Right click 'Command Prompt' and run as Admin.
Step 3. Type the command 'net stop wuauserv' (without quotes) and press Enter; keep the Command Prompt open.
Step 4. Now open Computer or any File Explorer and open the folder: C:\Windows\SoftwareDistribution.
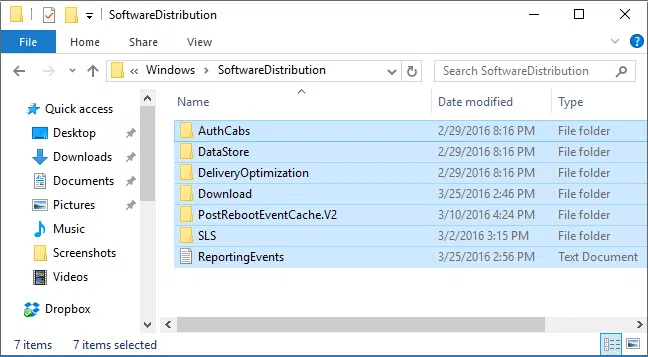
Step 5. Press CTRL + A to select all the files, and press 'Delete' to remove all the files. You can safely delete everything from here. It will not affect your computer or OS.
Step 6. Now we need to restart the Update Service. Go back to the Command Prompt and type 'net start wuauserv' (without quotes) and press Enter again.
Then, restart the PC in the normal mode. Run Windows Update again to find out if the issue has been fixed.
Solution 3: Update Your Windows Update Service
If you haven't updated the Update Service itself in a long time, you will need to update it first. The outdated Update Service tool will prevent the update at times and thus you need to make sure that it is up to date.
Step 1. Go to Control Panel and Click 'System and Security'.
Step 2. Click Windows Update.
Step 3. Select 'Never check for updates (not recommended)' from the dropdown in the 'Important Updates' section.
Step 4. Click OK and reboot your computer. Depending upon whether you have a 32 bit or 64 bit computer, download the following updates:
32-bit:
1) https://www.microsoft.com/en-us/download/details.aspx?id=53335
64-bit:
1) https://www.microsoft.com/en-us/download/details.aspx?id=46817
Step 5. Now go to the folder where these updates are saved. First install the update that reads 'KB3020369' and then install 'KB3172605'. You will need to reboot your computer after the installation and then wait for about 15 minutes for the process to complete.
Step 6. Go Back to Control Panel > System and Security > Windows Update.
Step 7. Select 'Automatic' in the dropdown under 'Important Updates'.
Conclusion
System Updates on Windows 7 get stuck sometimes. You need to fix this issue to make sure that your computer is up to date. You may need to clear the update cache to fix this issue. You may also need to update the Windows Update Service as well.