Have you ever come across an issue when you are trying to open a file or a folder, and it is asking for certain permissions? It is a common issue with most of the users of Windows.
What's Take Ownership?
"Take Ownership" simply means what it means to be taking permission. Now why does this need arise in Windows? The answer is compatibility issue. For example, If you were using any other version of Windows, supposedly Windows 7, then all the files and folders were created during the functionality of that version became compatible with that version alone. It could easily be opened or accessed from that particular version.
But let us assume that you have updated your Operating System from Windows 7 to Windows 10, the files and folders would still be there in your secondary storage system. But it is not necessary that they would open up like they did in previous version. You may find troubles opening them in the latter version you are updated to. This is where the need of "Take Ownership" comes. In the new version of your operating system, the files and folders find some issues which need to be fixed by making them compatible with the updated version. The allowance of compatibility comprises in asking for permission from the recently updated version of your operating system to let the files run. There are several modules pre-installed in every operating system of Windows, which allows alteration in the MMC (Memory Management Consoles). By these changes, users can easily bypass the obstructions created due to incompatibility issues.
This article will shows two ways to help you take ownership of a file and folder on Windows 10.
Part 1. Add the "Take Ownership" for Files Using Registry Editor Manually
Instead of heading on with several difficulties by too many steps of GUI and command line, why don't we use a simple context menu command that instantly gives you the permission to take ownership? The following method deals with this particular technique.
Standard Warning: You may not know but Registry Editor is such a powerful tool of Microsoft that mishandling it can render your system unstable or can even make it disabled. Thus you should be cautious enough to handle it while following the steps below.
Step 1. Go to the "start" menu and type "regedit".
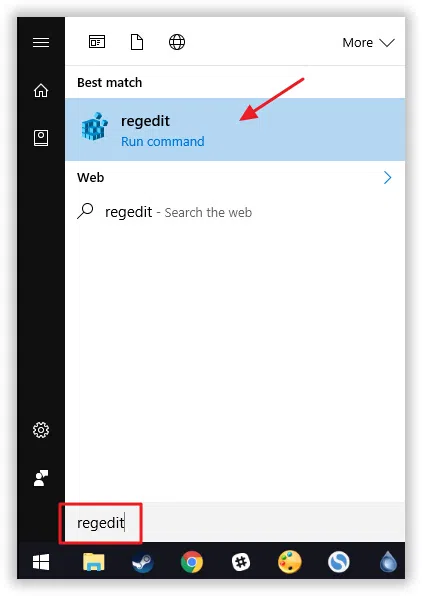
Step 2. Press enter to open the panel of registry editor by giving it permission to make changes to your PC.
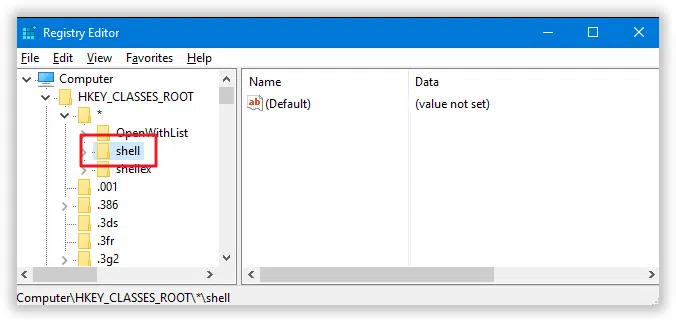
Step 3. On the right side bar, scroll down to the following option called "shell".
HKEY_CLASSES_ROOT\*\shell
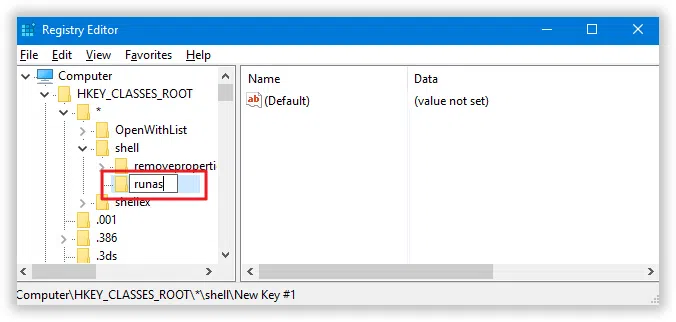
Step 4. Next you have to create a new key named as "runas". Right click on the "shell" option. Add "New" and create a "Key".
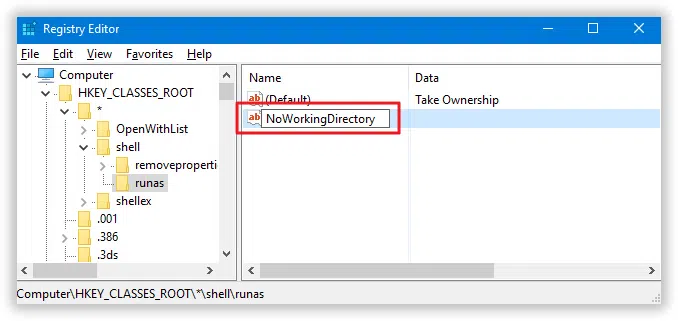
Step 5. Name the new key as "runas'. If you already find a key present as "runas", simply skip the step.
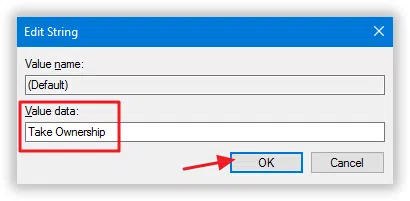
Step 7. In the property windows box, type "Take Ownership in the ‘Value Data" box and press "Ok". The value you type here will be seen as the appearing command in your context menu, so you can change it to any value as per you wish.
Step 9. You can name the new value as "No Working Directory".
Step 10. Now you have to create a new key inside "runas" key. Right click on "runas" key, select "New" and then "Key". Name the file as "command".
Step 11. Now again with the new "command" key selected, double click the "default" option to open its property window.
Step 12. In the "Value data" box type or copy paste the following code and then press ‘Ok".
cmd.exe /c takeown /f \"%1\" && icacls \"%1\" /grant administrators:F
Step 13. Once you are done with it, you have to create a new "command" key. Right click on the "command" key; select "New" and then "String Value". Name it as "Isolated Command" and then double click it to open its property window.
Step 14. Type or copy paste the same code in the "Value Data" box, and then click "Ok".
After doing the entire laborious work "Take Ownership" command will be added in you context menu to open the files which were blocked.
Also see:
1. Enable and Disable Built-in Administrator Account on Windows 10/8,8.1/7
2. User Profile Service Failed the Logon Windows 10/8/8.1/7- How to Fix?
Part 2. Take Ownership for Folder in Windows 10 Using File Explorer
This method would not require registry modifications but rather simple changes in the properties of the file or folder you choose. In this guide, we'll walk you through the steps to take ownership of files and folders on your Windows 10 using File Explorer.
Step 1. Open the windows explorer to locate the file or folder you want to take ownership of.
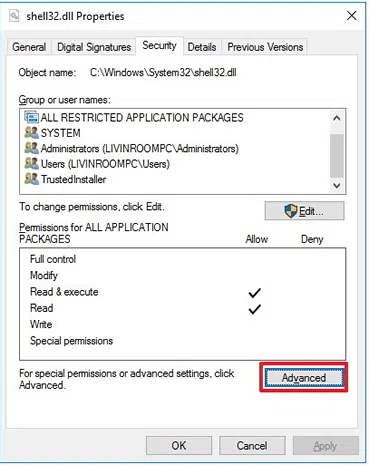
Step 2. Right click on the file and choose "properties" and then "Security" tab.
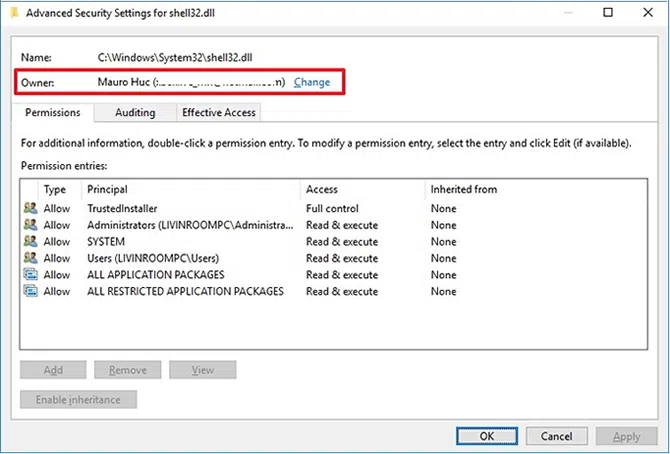
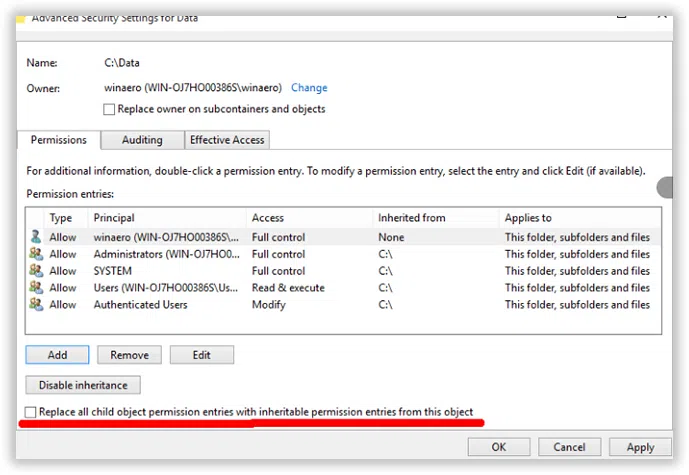
Step 3. Click the "Advanced' and then the "Owner" tab.
Step 4. Now once you are done with this, click "Edit" and follow any of the two below mentioned techniques.
4. 1 In order to change the owner to a group or any user simply selects "Other users and Groups". In the "Enter the object name to select" type the name of the group or user and then click "ok".
4. 2 In order to change the owner to user or group, which in case is listed in the "Change owner to" box, select the new owner.
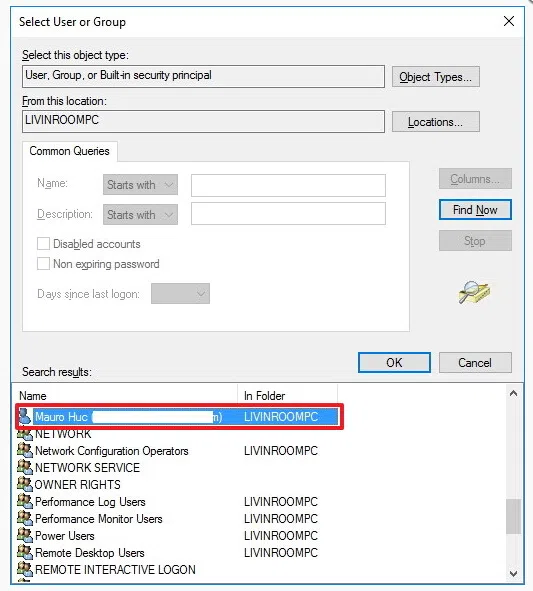
Step 5. On the "Select User or Group" page, click OK. and click Apply.
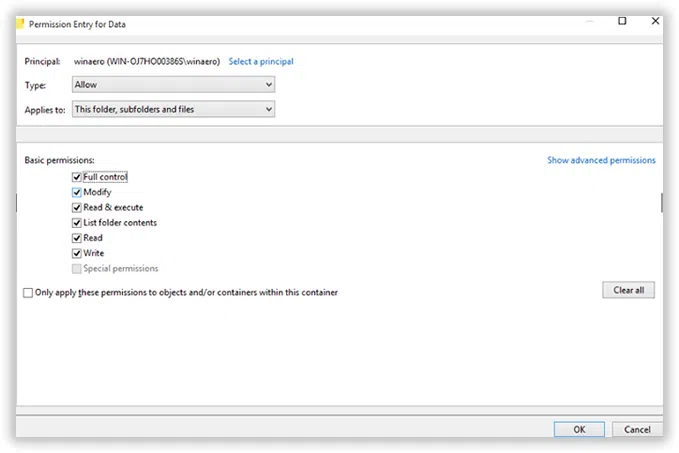
Step 6. Now, here you will need to offer a full access to the file or folder for your account. Just do as following. Right-click the file or folder again, click Properties, and then click the Security tab. You will see permission entry windows pops up after clicking "Add" button. Then set permissions to "Full control".
It's important to note that if you're taking ownership of a folder, you can click "Replace all existing inheritable permissions on all descendants" .
That's all. forllow the steps on part 2, you will change the ownership and got full access to the folder in Windows 10 by using the File Explorer. The article is aimed at providing you step by step guidance to Take Ownership of a file and folder in Windows 10. Do not try to incorporate anything other than what mentioned for registry tools for it can be fatal for your system.