If you are an avid Mac user using a Windows PC, and suddenly find a DMG file in your windows system, you would definitely want to open it up to see what it contains. Though the installation files or compressed files it contains will not be compatible with your windows PC, yet there are some ways you can check out what it withholds. But before proceeding with the ways to open or view a DMG file, it is better if we have a thorough knowledge of what a DMG file exactly is. DMG files are actually Mac OS disk image files. It is very similar to ISO files in windows, or rather a counterpart of ISO files.
The images usually comprise installation files of softwares and operating systems and sometimes, compressed files. Since you are using a windows PC, surely you won't be able to run it on your Window OS, but at least there are ways by which you can have a look at its contents. And that is what we are going to discuss in this article - ways to view the DMG files on Windows 10/7/8.
Way #1: Open DMG Files on Windows with 7-ZIP
7-ZIP is a lightweight freeware which is easily available on the internet market. It not only extracts DMG files but all other of compressed files, such as ZIP, CAB, ISO, RAR, WIM, etc. But we would restrict our discussion here only upto DMG. Read the steps below to know the tool's usage:
Step 1. Download the 7-ZIP program file in any of your working computer and install it.
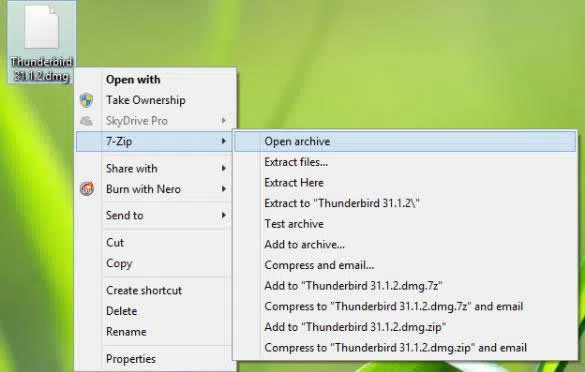
Step 2. After installation is done, locate the DMG file that you wish to open or view in your directory or desktop, and right-click on it.
Step 3. From the context menu, click on "7-ZIP" which will not appear as a part of your system since installed.
Step 4. From the next sub-menu that follows click on "Open archive" and your DMG file will be opened and you can view the contents inside.
Cons:
- You cannot view or extract files bigger than 4 GB.
- You cannot view or extract encrypted files.
- You are only allowed to extract 5 DMG files at a time.
Way #2: Open DMG Files with DMG Extractor
DMG Extractor is another professional tool to open and extract .dmg files without first converting them into .iso or .img files. It's interface is very user-friendly and even a beginner can use it without any difficulty. Just go through the steps below to pull off the task:
Step 1. First of all, download the DMG extractor program file from the internet and install it in your personal Windows PC.
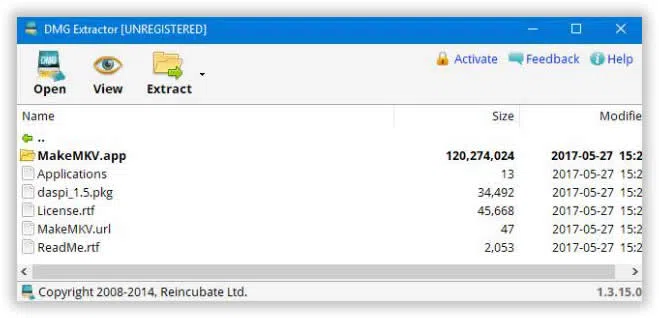
Step 2. Run the application with admin rights and in the main UI of the tool's screen, click on "open" button in the upper menu bar to browse the required DMG file. The file will be loaded into the software's screen.
Step 3. After the file is loaded, you will be displayed all the contents contained within the DMG file.
Cons:
- You cannot view or extract files bigger than 4 GB.
- You cannot view or extract encrypted files.
- You are only allowed to extract 5 DMG files at a time.
Way #3: View DMG files on Windows with UltraDMG
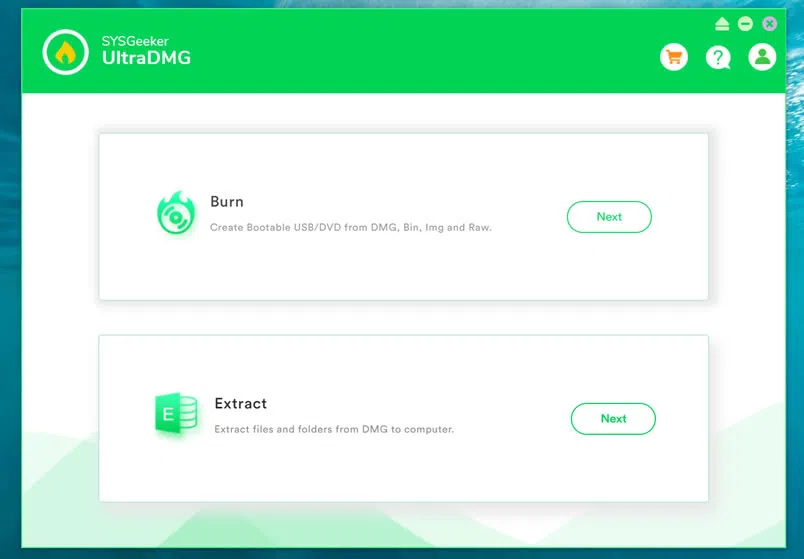
UltraDMG is yet another very powerful professional tool which can open, burn, extract, create, edit, convert, any kind of disk image files. It can process every kind of image files, be it BIN, DMG, ISO, DAA, etc. Here we would burn the image file into a CD/DVD or USB and then will open it from the disk storage to check out what it contains. But before you head on the tool's usage, better have a look at its specifications to use it in a better way.
Step 1. Get the program file downloaded from the official website and install it in your Windows computer.
Step 2. Launch the utility with admin privileges and then insert a empty Disk (CD/DVD or USB) in your computer. Then click on "Extract" option from the menu.
Step 4. Now the "DMG Extractr" option will be shown in the UltraDMG Window's screen.
Step 5. Click on "Load DMG " button to fetch the required DMG files from your computer's directory.
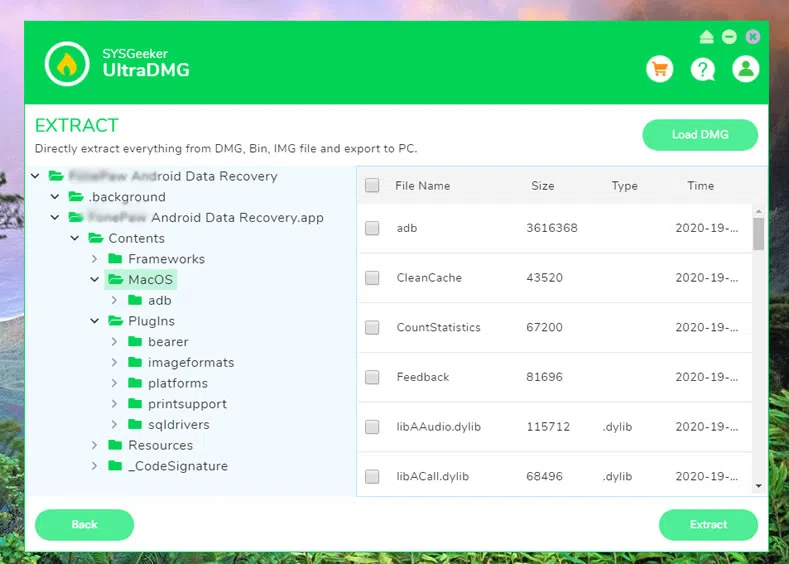
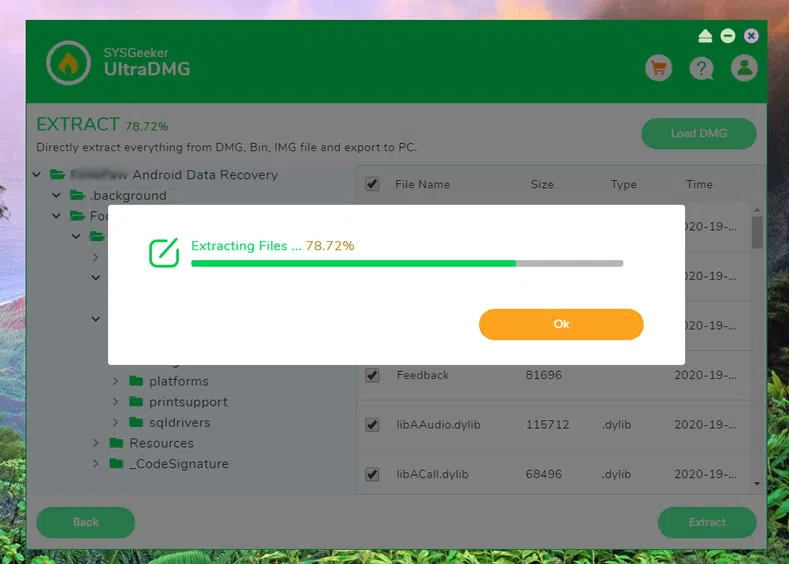
Step 6. Once the DMG file is loaded on program, all the files will be expended in a collection of trees, just select the files, folders or the entire DMG image, then click Extract button to save the files to your computer. Open the disk from "My computer" and click on the DMG file to view what it contains.
Conclusion:
After going through all the methods mentioned above, you must have realized by now that the first two tools implemented have got several demerits and thus can be not relied upon fully. So in order to have all the facilities with disk images, better stick to way 3 for a guarantee result.