Internet has become the lifeline of people. A lot of us rely on internet for our jobs and earnings. This is why it is extremely important to keep internet up and running at all times. Sometimes, your Windows 7 may not connect to the internet. If you are experiencing the same issue, here are some of the troubleshooting methods you can try.
Well, there are four methods for you to solve the issue when Windows doesn't connect WiFi network. This article we take Windows 7 as an example to explain how to fix the Wifi connection issue. It is also the case with Windows 10 and Windows 8/8.1.
Method 1: Using Network Troubleshooter
Network Troubleshooter is the Diagnostic tool built in to Windows OS 7 to detect network related problems and to provide recommended solutions. When you launch this tool it scans the network settings and available networks and displays the results. In many cases, Windows 7 will itself detect and fix the issues though Network Troubleshooter. Even if it doesn't fix the problem, you will have some idea as to what is causing the issue. Here is how you can do that:
Step 1. Right click on the network icon on the Task Bar, in the notification area (system tray) and choose 'Troubleshoot Problems'.
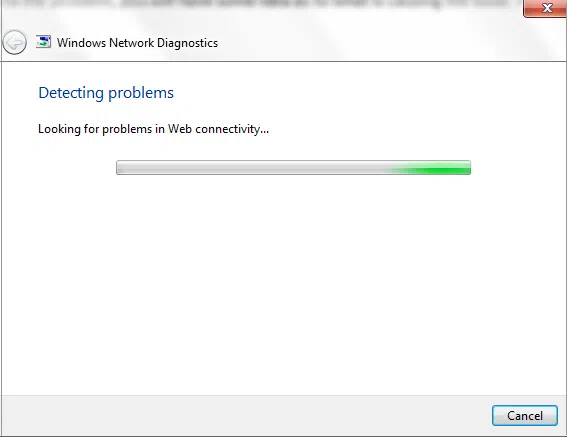
Step 2. You will see the Windows Network Diagnostics screen which will show 'Detecting Problems' and try to detect any network problems.
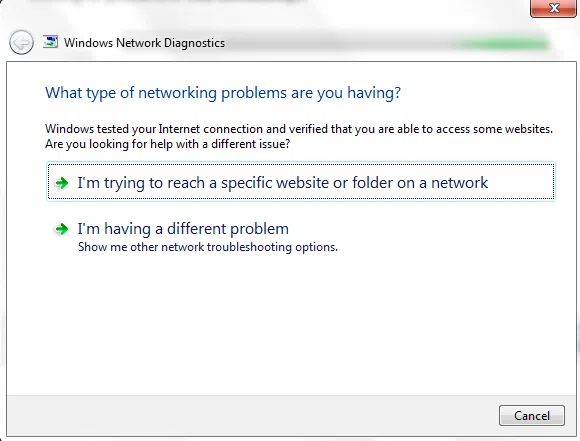
Step 3. Now you can choose the type of problem you are experiencing. Windows will test your internet connection an verify if you can be able to access to some site. Choosing the right option may help you diagnose the issue and solve the problem.
Method 2: Check for the Basics on Your Computer
Sometimes a small problem goes unnoticed and causes issues with Wi-Fi connectivity. Sometimes we miss the basics and try to resolve the issue at the bigger level. But, it is important to cover the basics first before moving on to advanced troubleshooting. If you could not get the issue resolved by running the Network Troubleshooter, you will need to make sure that the basics are covered.
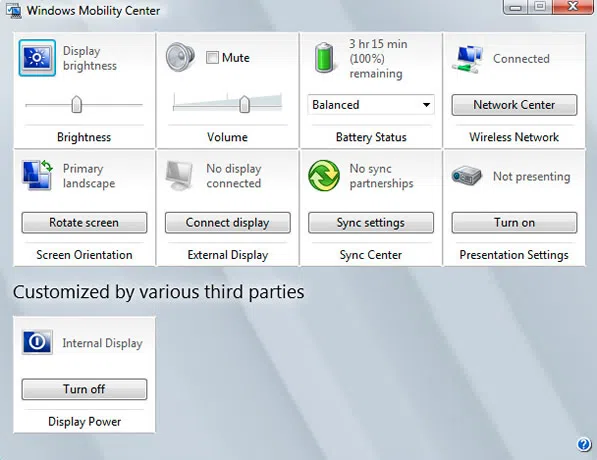
1) Make sure that the Wi-Fi is turned on or Wi-Fi adapter is inserted properly If you are using a laptop, you will need to make sure that the Wi-Fi is ON or Enabled. You can go to Start > Control Panel > Mobile PC > Windows Mobility Center
2) Also make sure that the physical Wi-Fi switch on your laptop is ON. If you are using a desktop computer, which uses a wireless adapter to connect to Wi-Fi, make sure that the adapter is properly inserted and is working

3) Make sure your laptop or PC is within the wireless range of the router. If you are getting weak signals, move it closer to the router, the router must be near another cable or telephone jack.
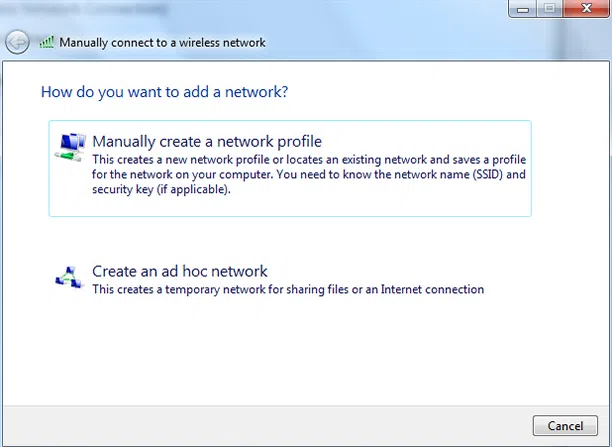
4) You may need to set up the network profile manually. This is required when the access point or router is not broadcasting the name of the network. This is how you can do it: Go to Start > Control Panel, in the search box type Wireless and then choose Manage Wireless Networks Click Add and then click 'Manually Create a Network Profile', then enter the network details/information.
Method 3: Restart the Modem and the Router
If you're still have troubles getting Windows to connect to your router, you can try restoring the router's settings to factory settings, you need to reconfigure your Internet connection settings again with your account. In many cases you can fix the Wi-Fi connectivity issues on your Windows 7 by resetting the modem and/or router. This will build a fresh connection with the internet provider. While you are resetting the modem/router, all the devices connected to them will lose the connection temporarily. The steps may vary across the device make and models but more or less are the same:
Step 1. Remove the power connection to the modem or router. If your device uses a battery, make sure you take the battery out
Step 2. Wait for about a minute and then plug it to the power source again. If the modem uses battery, put the battery back in
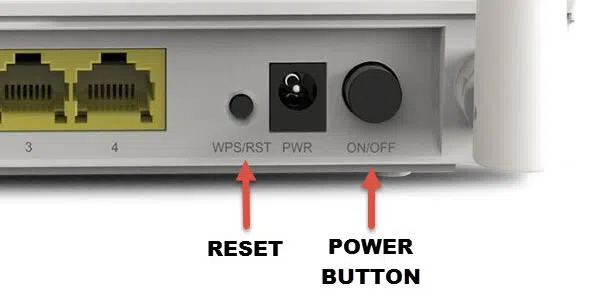
Now wait for about a minute or two for the modem and router to turn back on completely. You should see all the lights back on. Now try to connect your PC with Wi-Fi again. Many modems come with built-in routers; if that is the case you will need to reset the modem only.
Method 4: Check If the Problem Is with Your Internet Service Provider
If Wi-Fi is not working, there could be the problem with the ISP and probably everything is okay locally. This is why it becomes important to identify if the ISP server is causing the problem or it is something else.
In order to make sure that the problem is not with your ISP, here is what you can do:
1) Click Start menu
2) Type in Cmd in the search box
3) Right click on Cmd in the list
4) Choose 'Run as administrator' and select Yes.
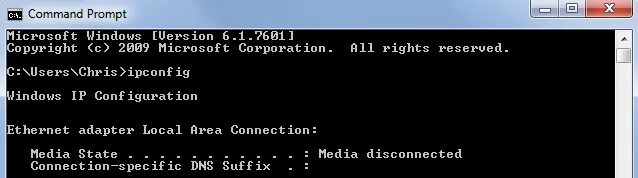
Now, enter iPconfig on the command prompt and press enter. You will find the IP address by Default Gateway. Note down the IP address (let's say it is 192.168.1.1). Now you need to go back to the command prompt and type Ping 192.168.1.1
If the Ping is alright and still you cannot connect to the Wi-Fi, it means that there is either something wrong with the Modem or the ISP.
Conclusion
If Windows 7 won't connect to Wi-Fi, there could be a problem with the computer, modem/router or ISP. But, you need to detect the problem first. This is why it is important to follow the troubleshooting steps that have been listed here.