If you have been a user of iOS devices for quite a long time, then surely you would have a liking towards exploring more of what Apple products can offer you. With every release of its new operating systems, there are some new features which are always introduced into it that are quite fascinating and user-friendly to the user.
Now iOS 11 is all set to widen your wonderful experiences to a whole new level with the introduction of again many new features.
Why would you want to upgrade to iOS 11?
Like all the previous versions, iOS 11 has got a lot more than you can imagine compared to what has been introduced before in the previous versions. Few of its wonderful features are given below as follows:
- Subtle design changes have been introduced to all the elements of the operating system, like calculator, and others apps have got a new look, text is bolder, control section and lock screen have been modified in appearance.
- The Control Center can be customized and there are options to include many new settings, like 3D Touch integration is expanded and many more.
- Siri has been modified with a more natural tone and is much more intelligent on various aspects than before, for instance it can translate English into different languages, etc.
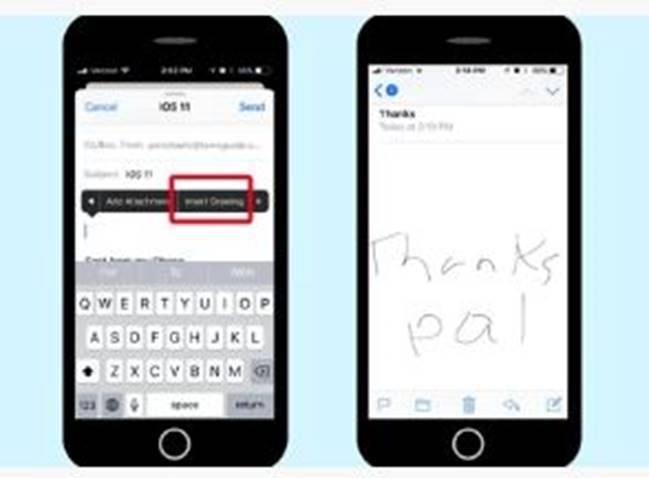
- Notes have made handwritings searchable and document scanning
- Camera app is modified with Portrait Mode and Live Photos.
So now here in this article, we would explain you the techniques to upgrade your current iOS on your iDevice to iOS 11, though in its beta version.
Now basically the procedure is divided into four categories that are:
- To make an archived backup of iPad or iPhone.
- To Register for iOS 11 Beta 3.
- To install the iOS 11 Beta 3 on your iDevice.
- To Get Started with your newly installed iOS version.
Keep reading to know the methods categorically in the article below:
Part 1.To Create an Archived Backup of iPad or iPhone
Before you begin with this method, make sure to backup your iPhone and also ensure that your iDevice is compatible with this latest iOS version.

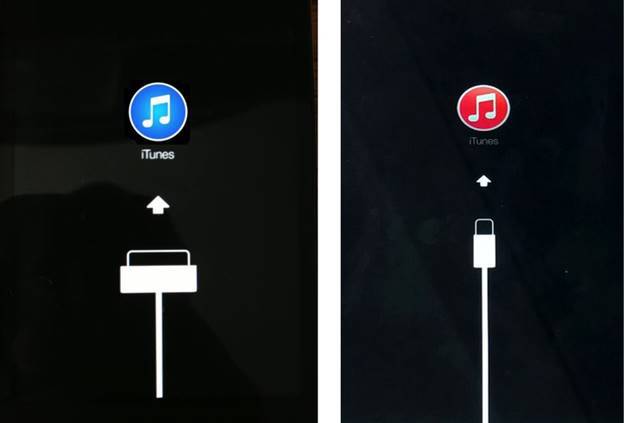
Step 1.First of all; connect your iDevice to your Windows or Mac PC with the help of an USB cable.
Step 2.Once you have set up the connection via USB cable, launch iTunes.
Step 3.Now; from the menu bar, click on your Device icon.
Step 4.Make sure that backup settings is set to “This Computer” and you have got the “Encrypted backup” option “Enabled”.
Step 5.Click on “Encrypt Backup” and then add a password to the backup.
Step 6.Before proceeding further; ensure to create a backup of your iDevice apps as well.
Step 7.Once you are done with the backup procedure, press “Command” to open the “Preferences” section. You could have clicked on “iTunes” and then clicked on “Preferences” as well.
Step 8.After you have completed this step, click on “Devices” tab, and then option-click on “Backup” and choose “Archive”.
When you have completed this first step of upgrading, move on to the next one discussed below.
Part 2.To Register your Account for iOS 11 Beta 3
In order to download the iOS 11 beta on your iPhone or iPad, you first need to possess a developer account with Apple. Thus in this section we would explain you how to use that Apple account to download the iOS 11 beta 3 in steps.
Step 1.Visit the following link http://www.developer.apple.com/ on your iOS device to develop the Apple account if you haven’t created it yet and then click on the next link as follows: https://developer.apple.com/download/
Step 2.Once you have opened the following link, sign in with your developer account username and password which you have created by visiting the first link.

Step 3.Now; go to the “11 beta section” and tap on the “down arrow” to expand the download procedure.
Step 4.Tap on “Download” in the configuration profile. If you are prompted to choose any device, select the iPhone or iPad you want to upgrade with iOS 11.
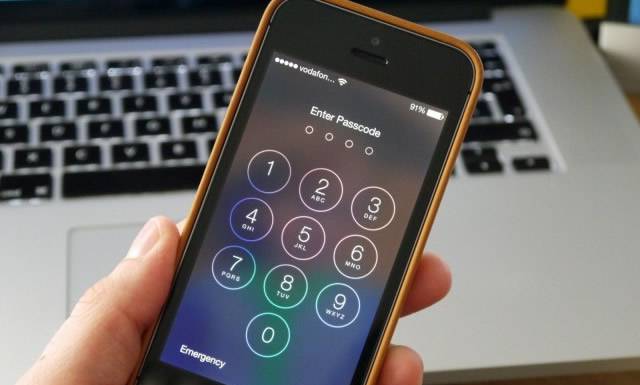
Step 5.When the Beta software profile turns up on your iPhone, tap on “Install” and your “Passcode” in case you are asked.
Step 6.Agree to the terms and conditions and tap on “Install” option at the uppers right corner and then at the bottom of the screen.
Part 3.To Install the iOS 11 Beta 3 on iPhone or iPad
Now after the device restarts, you have to follow the mentioned protocols below to install the new operating system properly on your device.
Step 1.Open “Settings” on your device, and tap on “General” and then on “Software Update”.
Step 2.When the update shows up, tap on “Download and install” and enter your “Passcode”.
Step 3.Tap on “Agree” twice to confirm the terms and conditions of the new operating system, and your iDevice would automatically reboot to install iOS 11.
Part 4. To Get Started with your newly Installed iOS Version
After your system is finished with rebooting, it will run the new iOS 11 version on your iDevice.

Step 1.Unlock your iPhone and tap the “Continue” option.
Step 2.Enter your Apple ID password.
Step 3.Tap finally on “Get Started” to begin the fun.
Conclusion:
Once you have installed the iOS 11 Beta 3 on your iDevice, you will enjoy a whole new world on your device. The fun is not restricted only to few aspects, but the entire system would seem to be different with more exciting features to try. One thing that you need to keep in mind while performing the instructions above, the network or Wi-fi strength need to be smooth enough while downloading the beta file.
The user needs to have the basic expertise to handle the system settings and modification preferences in the guidelines above.