
Have you upgraded your macOS recently to Big Sur and started facing issues? Well, downgrading to Catalina from Big Sur can be a solution for you. If this is what you want to do, but not sure how to do it, don’t worry. We have created this step-by-step guide on how to downgrade from macOS Big Sur to Catalina just for these times.
Why should You Downgrade from macOS Big Sur to Catalina?
There can be a number of reasons why you would want to downgrade from Big Sur to Catalina. Maybe you installed Big Sur on an unsupported Mac and now facing performance issues, or maybe the genuine upgrade didn’t happen properly. In any case, now that you are sure that you would want to downgrade your Mac from Big Sur to Catalina, just follow the steps below and you would do fine.
Backup Your Mac
The first thing before starting with the downgrade process is to backup your Mac. Here’s how you can do it:
- Insert an external HDD with ample free space in your Mac.
- Head over to System Preferences by pressing the Apple logo.
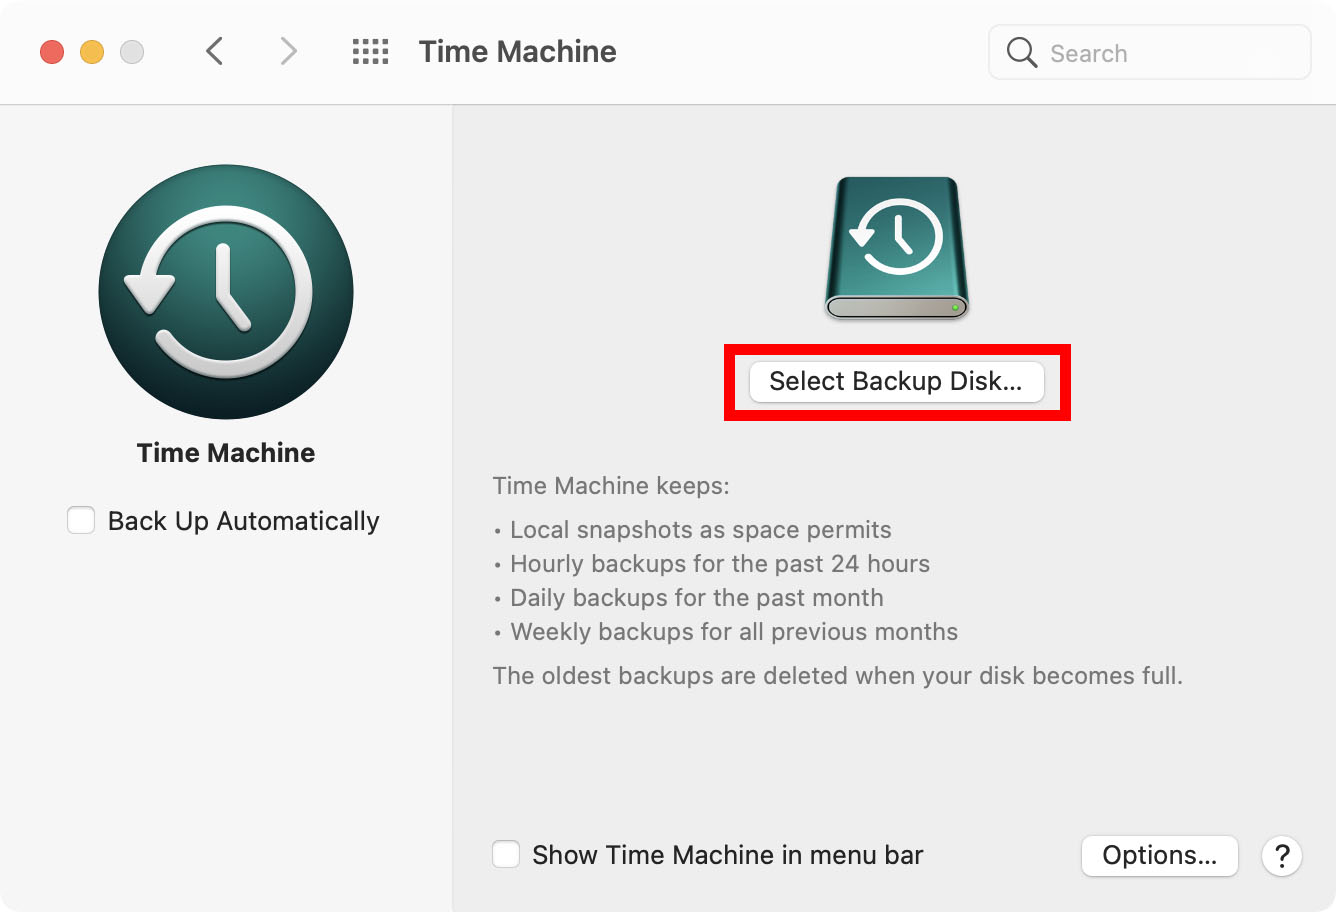
- Press the Time Machine logo.
- Press Select Backup Disk to choose the external HDD, then press Use Disk.
- Select Backup Automatically checkbox and that should start the backup process.
Erase Your Mac before Downgrading macOS Big Sur
In order to downgrade from macOSBig Sur to Catalina, you need to erase the internal HDD of your Mac first. This is not directly useful in installing Catalina, however, if you have a faulty installation where Big Sur was not installed properly, this would definitely be a life changer. To do this, simply follow the instructions below:
- Shut down your Mac devices and then restart it.
- Once it starts to reboot, press and keep pressing the Cmd, and R keys on your keyboard all at once.
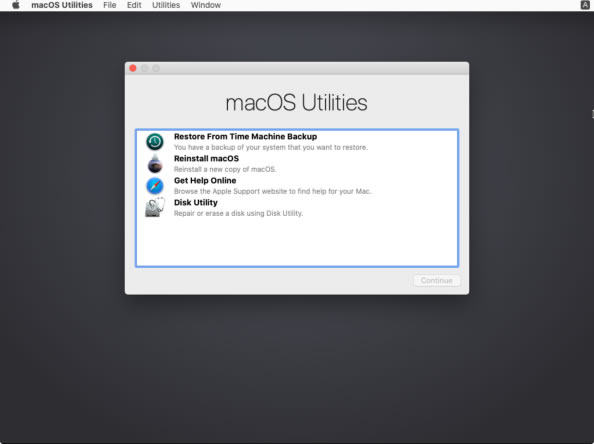
- Once the Mac restarts (which might take some time now), you’ll see a macOS Utilities windows, from here press Reinstall macOS, then press Continue.
- Follow the instructions on the screen, select your startup disk, then press Install.
- Once the process completes move to the next steps as listed in the below section.
How to Downgrade from macOS Big Sur to Catalina
Method 1. Downgrade to macOS Catalina via Time Machine Backup
- If you have created a backup before installing Big Sur using Time Machine, you can use that to install Catalina on your Mac. Here’s how you can do it:
- Plug in the external HDD where you had created the backup and restart the Mac3
- While the Mac is rebooting, press Cmd and R keys together.
- The macOS Utilities screen will pop up once again. Press Restore From Time Machine Backup and then press Continue.
- Press Continue once again, then choose the backup that you would like to restore.
- Keep following the instructions on the screen and you should have a downgraded Mac with Catalina installed in it.
Method 2. Downgrade to macOS Catalina in macOS Recovery mode
If you do not have a backup created using Time Machine, this method can help you in that case.
- Connect an external HDD/USB flash drive with 12GB of free space to create a bootable media
- Go to Finder, then Application, then to Utilities, finally open Disk Utility.
- Choose your external drive from the list on the left side below External, then press Erase at top.
- From Format, choose HFS+ or APFS depending on which file system you would like to choose for your external drive.
- Press Erase, and then press Done when the process is completed.
- Next, you need to create the installer. You can do that by typing the below command at a Terminal and pressing Enter. Ensure that you replace MyVolume at the end of the command with the name of your external HDD .
- sudo /Applications/Install macOS Catalina.app/Contents/Resources/createinstallmedia –volume /Volumes/MyVolume
- You have to enter your Administrator password now, and then press Y, finally press Return.
- Once the process is completed, eject the external HDD after pressing Done.
- Now, reboot your Mac and press and hold down the Cmd and R keys on your keyboard.
- Now press Disk Utility, then Continue, then Startup Disk, finally press Erase to clean format your internal HDD on your Mac.
- Choose HFS+ or APFS and confirm.
- Once done, connect the external HDD and restart your Mac
- Press down the Option button while it reboots.
- Next, select the external HDD, press Continue and keep following the instructions on the screen to install Catalina on your Mac.
Restore Data from Backup
Once you have downgraded to Catalina, you might consider restoring the data that you had backed up earlier. Here’s what you can do:
- Go to Finder, then Application, then to Utilities, finally select Migration Assistant. Then press Continue.
- Next, choose the option From a Mac, Time machine backup or Startup Disk, then press Continue.
- Choose the stuff that you would like to restore and press Continue.
- Finally, press Continue to start the restoring process. Wasn’t that simple!
This article was written to help you downgrade from macOS Big Sur to Catalina. Hope this helped you resolve the issues you were facing with your copy of Big Sur.


