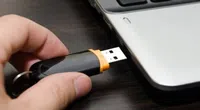
In many cases, you need a bootable USB drive, one of the most important thing is that your computer failed to boot due to virus, serious system failure, damaged hard drive, or partition issues, then you have to reinstall system. Fortunately, Dr.Boot tool can be able to help create a powerful and all-in-one bootable USB drive from Windows, Linux and Mac without typing commands.
Let's see how Dr.Boot works!
Install and Register
Step 1. Download, Install the Dr.Boot on A Windows Computer
Firstly, you should download and install the trail version on a Windows computer. Then launch it.
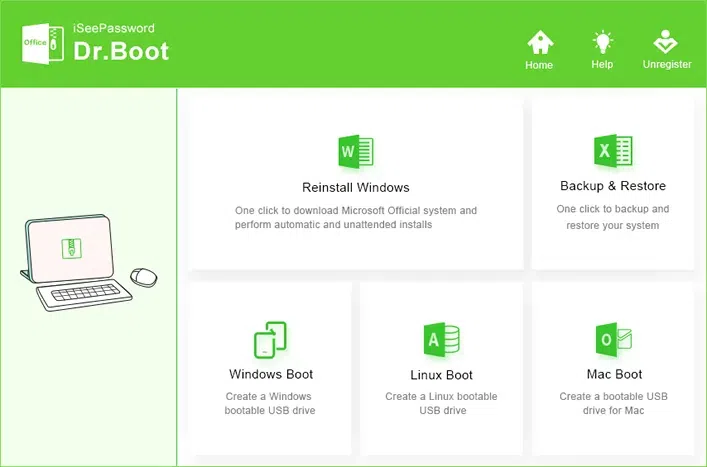
In the main Window, you will see 5 features in it, they're "Reinstall Windows", "Backup & Restore", "Widnows Boot", "Linux Boot" and "Mac Boot".
Step 2. Register the Program with the License key
Click the "Register" button in the top right corner. After you purchased , you should receive a license key, it also named registration code. Type the code and purchase e-mail on the registration box and click Register button.
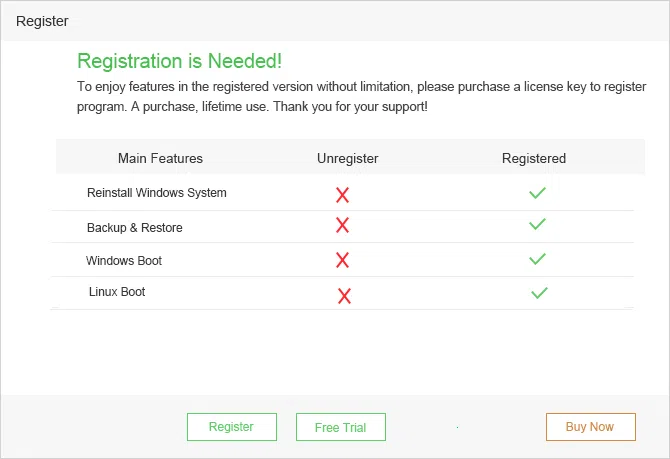
Click the Register button to then paste your license key and email to box.
Feature 1. Reinstall Windows
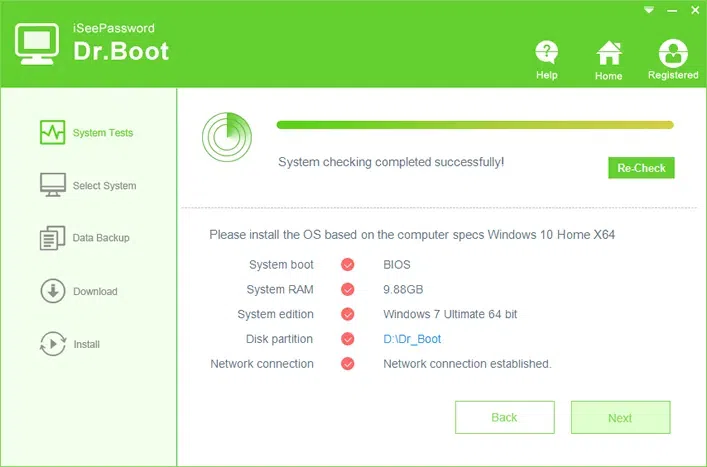
Step 1. Check Your System
Select the "Reinstall System" option and enter the "System detection interface", Dr.boot will check your system configuration automatically.
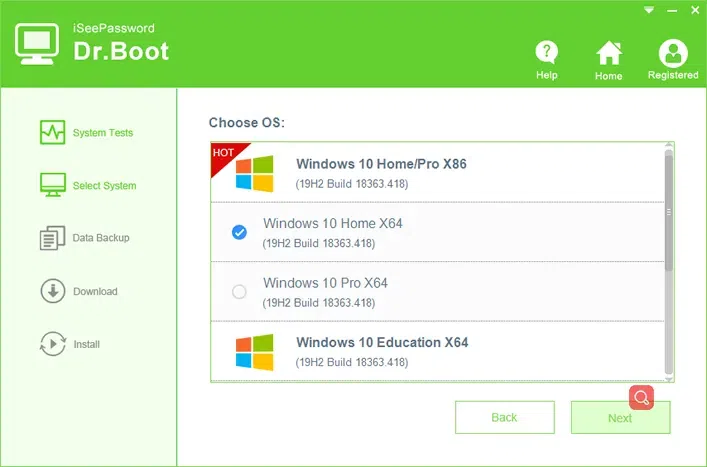
Step 2. Select System
There are many Windows system in the list for you to choose from. All downloads of Windows OS are connected to access interfaces of Microsoft, it means all the copy of Windows OS you downloaded here is as the same as the one you download from media creation tool. They’re all the official Windows OS.
Step 3. Back Up Your Data
Here you're allowed to back up data on your computer desktop, Favorites, My Documents. It will be backed up your data to Dr_Boot Folder.

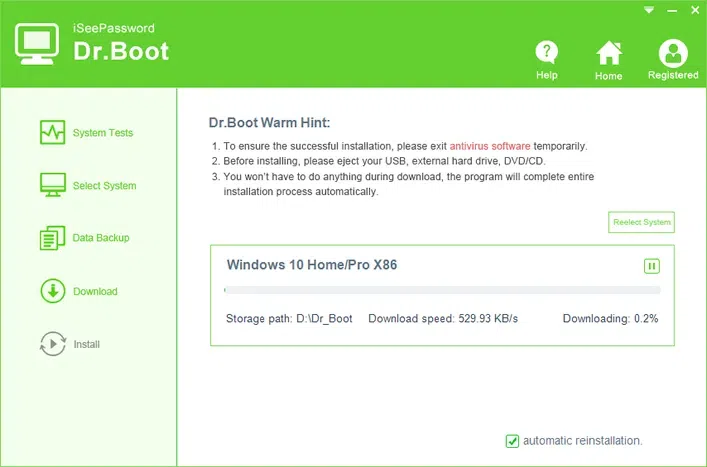
Step 4. Start to Download Windows OS
Now, Dr.Boot starts to download Windows OS, it will take 2 - 5 hours based on your network speed, leave your computer to download Windows, and don’t forget to check the "Automatic reinstallation" option. Your system will be installed automatically once the download is complete.
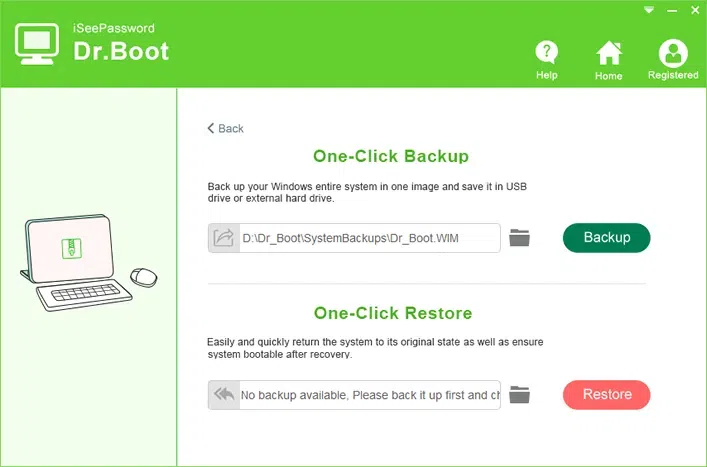
Feature 2. Backup and Restore
Select "Backup and Restore" option from the main interface, then specify a location to save your system. WIM file. You can back up Windows system to local hard drive, USB drive or external hard drive.
Feature 3: Windows Boot
Dr.Boot allows you to create a Windows bootable USB drive from ISO file, it works with all Windows ISO, such as Windows 10/8/7/XP/Vista/Server.
Step 1. Import Your Windows ISO file by clicking "Browse" button.
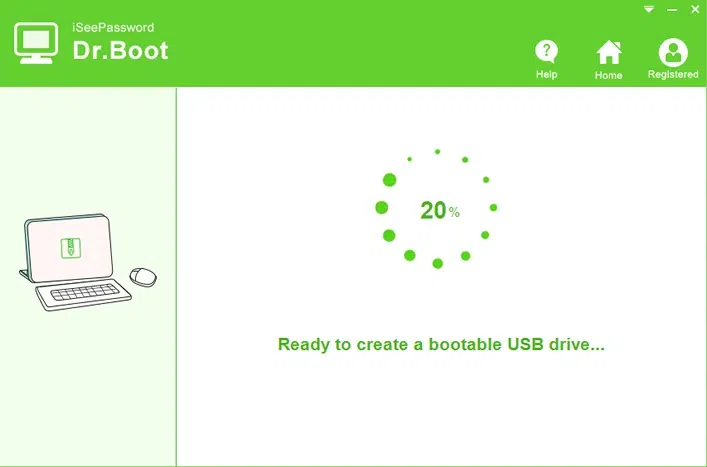
Step 2. Plug in your USB drive to computer and select a system format (FAT32 or NTFS)
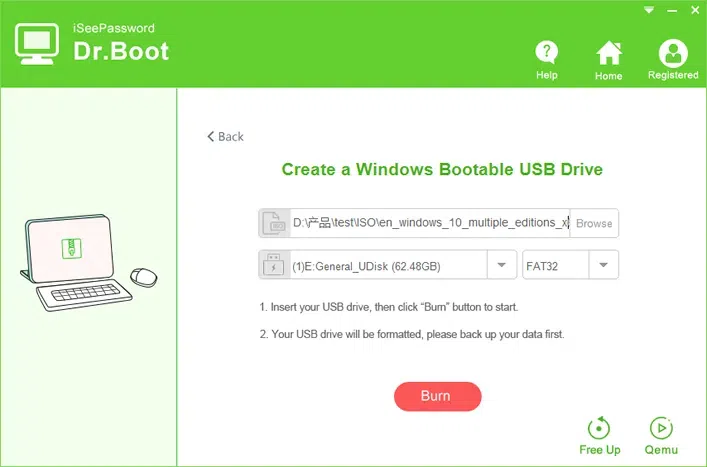
Step 3. Click "Burn" button to write ISO image to your USB drive.
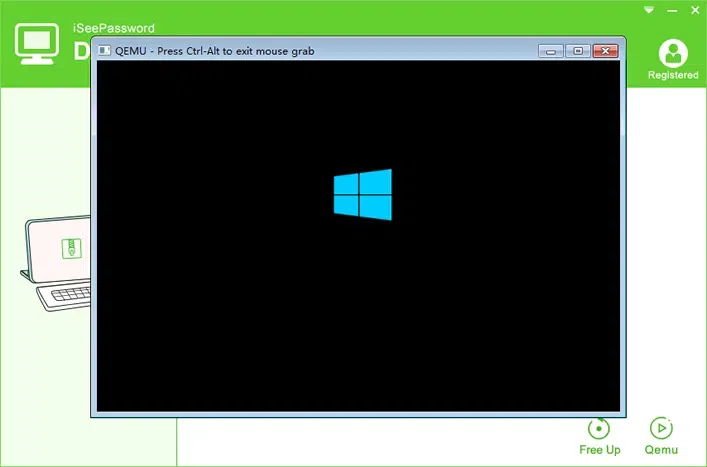
Step 4. When creating a bootbale USB from Microsoft Windows ISO file, Qemu feature makes is possible to directly test your USB without restarting computer continually, just click Qemu button on the bottom of the program and select BIOS or UEFI, then your bootable USB will be loaded in virtual machines.
NOTE: You should notice that your USB storage space is getting smaller seriously after USB creation is complete. Dr.Boot could free up your USB space with one click. Super easy!
Feature 4: Linux Boot
Dr.Boot also helps you create a bootable USB driev from Linux os, and it fully supports all Linux OS, such as: LINUX MINT, MANJARO, DEBIAN , UBUNTU, ANTERGOS, SOLUS, FEDORA, ELEMENTARY OS, OPENSUSE
Step 1. Click "Browse" button to import your Linux ISO file to program and plug-in your USB drive, the program will identify your USB drive automatically. Then click Burn button to start to write Linux ISO to USB.

NOTE: You should notice that your USB storage space is getting smaller seriously after USB creation is complete. Dr.Boot could free up your USB space with one click. Super easy!
Feature 5: Mac Boot
"Mac Boot" is still in the developmental stage, our team is hard at work to make it live as soon as possible online.