Backing up your Android contacts to your computer is a great way to ensure that all of your important contact information will be safe and secure. Here are the steps you can take to back up your contacts:
1. Open the Contacts app on your Android device.
2. Tap Settings, then select “Export” or “Export/Backup” from the list of options.
3. Select where you want to save the backup file (such as an external storage device).
4. Once saved, plug in the storage device into your computer and copy over any files containing backups of your contacts onto it for safe-keeping.
Can I back up my Android phone contacts to my computer?
How do I transfer my phone contacts to my computer?
Transferring your phone contacts to a computer can be an easy and convenient way of keeping track of all your important contacts. There are a few different methods you can use, depending on the type of device you have and the operating system it runs. Below are some steps that will help you transfer your phone contacts to a computer:
1. Connect Your Phone To Your Computer: Depending on the type of device you have, there are several ways to do this. For Apple devices, connect your iPhone or iPad to your Mac with either a USB cable or via Wi-Fi Sync; for Android phones, use a USB cable and enable “Media Transfer” mode; while Windows Phones require connecting via USB as well but must also install software such as Zune first in order for it to work properly.
2. Backup Your Contacts: Once connected, backup any contact data stored on the phone such as address book entries, emails addresses and other information associated with each contact entry. This is necessary if you want an up-to-date version when transferring them over into another device/platform later down the line – especially if they change after being transferred once already between two platforms (e.g., from iPhone -> Android).
3 Export The Data To A Spreadsheet File Format: After backing up all relevant contact data from the device itself, export those details into either CSV (Comma Separated Values) format or XLSX (Excel file format). This will allow for much easier sorting & filtering when trying to find specific pieces of information for multiple contacts at once – making it possible even without having access directly onto someone’s personal mobile device!
4 Save The Spreadsheet On Your Computer And Update As Necessary: Finally save these files onto your computer somewhere accessible so that every time there is an update made within one’s address books across multiple devices/platforms (i.e., new entries added / deleted) then simply open up their spreadsheet again – make any necessary changes & re-save accordingly– ensuring accuracy at all times!
How do I copy my contacts from my Samsung phone to my computer?
Copying your contacts from your Samsung phone to a computer can be easily accomplished with the help of Samsung Smart Switch. Smart Switch is software designed to transfer data, such as photos and contacts between devices. To get started, you’ll need to download the Smart Switch app on both your Samsung phone and computer.
Once that’s done, here are the steps for copying your contacts:
1) On both devices, open up the Smart Switch app and select “Wireless” as the connection type.
2) On your Samsung phone, tap “Send” and then select Contacts in order to transfer them over to another device. If prompted, choose which contact account (SIM or Google/Outlook Exchange etc.) you wish to copy over.
3) On your computer now tap “Receive” under Wireless mode within the Smart Switch application window; this will allow it detect nearby devices sending content wirelessly across networks.
4) Select which device you want to receive content from – i.e.,Your Phone – by tapping its name when it appears onscreen within a few moments after step 3 above has been completed successfully . Depending upon what type of connections being used (Wi-Fi Direct or Bluetooth), an authentication code may display on one device that needs inputted into other for pairing purposes so make sure not skip these steps! Once paired correctly though all should appear fine shortly thereafter with data beginning its transfer process very quickly too if everything connected properly beforehand like expected!
5) Lastly check progress bar at top right corner monitor how far away completion still is estimated remain until finished before disconnecting either end otherwise risk losing any information yet sent but not saved onto target destination just yet due potential interruption caused premature termination before had chance finish transferring everything needed complete task entirely…
How do I export all contacts from Android?
Exporting contacts from an Android device is a straightforward process that can be easily completed in just a few steps. To begin, you will need to open the Contacts app on your device and select “Settings” from the options menu. From there, you should be able to find an option labeled “Export Contacts” where you can choose what format you would like to save them in (e.g., vCard or CSV). Once this is selected, follow any additional prompts regarding storage location and file name before tapping “OK” or “Save” to complete the export process. Your contacts will now be saved as a single file which can then be transferred over to other devices or shared with others via email or cloud storage services such as Google Drive or Dropbox.
How do I backup my Google Contacts to my computer?
Backing up your Google Contacts to your computer is an important way to maintain the security of your personal data in case of any unexpected events. It only takes a few steps and can be done quickly and easily. Here are the steps you should take to back up your Google Contacts:
1. Log into your Google account on the web browser of choice (e.g., Chrome, Firefox).
2. On the left side panel, click “Contacts” under “Google Apps” section or type “contacts” in search bar at top right corner.
3. Click on More option menu located next to Create contact button and select Export from it; this will open Export contacts window where you can choose which contacts group or individual contacts need backing up before clicking on Export button given at bottom-right corner; by default all contacts will get exported if nothing is selected manually from list view shown above export button
4. Select format for file that needs saving; Google supports vCard (for single contact) & CSV (for multiple/all contact backup) formats as output options, also zip compression can be enabled if needed
5 Pick one location for file saving & click Save button once done with selecting required settings
6 All set! Your Google Contact backup has been saved successfully onto specified destination folder
How do I backup my Android contacts without Google?
Backing up your contacts without Google on an Android device is possible and can be done in a few simple steps. Below, I will outline the steps for you to follow so that you can easily keep your contacts safe.
Steps:
1. Open the Settings app on your Android device.
2. Select Accounts and tap “Add Account” from the list of options at the top of the screen.
3. Choose “Skype” from among the available services listed under “Accounts & Sync” section and then log into Skype with your username/ password or create a new account if necessary.
4. Once logged in, select “Contacts” from among other options within Skype settings menu, which should bring up all of your current contact information saved on your phone at that time.
5 . Tap Export Contacts followed by selecting either CSV (Comma Separated Values) format or VCF (vCard File). This will save a copy of all contacts to either an SD card or internal storage depending upon where you decide to export it out to..
By following these simple steps, you can easily back up all of your Android contacts without using Google services such as Gmail or Drive etc., giving yourself peace-of-mind knowing that they are secure and safe against any potential data loss incidents due to hardware failure or malicious activity like malware infections etc..
How do I transfer data from Android to PC?
Transferring data from your Android device to a PC can be done quickly and easily using either a USB cable or Wi-Fi. Depending on the type of data you want to transfer, one method may be better suited for your needs than another.
Using USB Cable:
1) Connect the microUSB end of your cable into your Android phone.
2) Plug the other end (typically USB Type A) into an available port on your computer.
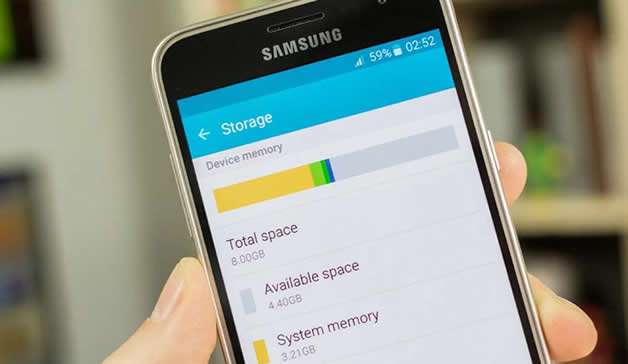
3) On your Android phone, open Settings > Storage > tap the menu icon in the top right corner and select “Transfer files” or “File Transfer” mode.
4) Your computer should detect and recognize that it is connected to an external storage device (your Android). You will then typically see a pop up window asking what you would like to do with this connection – choose “Open folder/file explorer”.
5) If needed, open File Explorer on Windows 10 or Finder on MacOS and navigate to This PC/Computer > Removable Disk where you will find all folders stored within your Android device’s internal memory as well as any additional SD card memory if applicable. From here you can drag & drop individual files between devices or copy entire folders over if desired. Once finished copying files, safely eject the removable disk by right-clicking it in File Explorer/Finder prior to disconnecting cable from both devices.
Using Wi-Fi:
1) Install AirDroid onto both devices – available through Google Play Store for free download & installation onto compatible Androids running OS version 4+; desktop versions are also available for Windows & macOS computers via official website at https://www.airdroid.com/en/. Be sure that both devices are connected securely to same Wi-Fi network prior proceeding further with setup steps below:
2) Launch AirDroid app on both phones & computers following initial install process; log in using same account credentials (create new account if necessary). Upon successful login, you should now see two separate windows side by side each containing information about local device currently being used along with remote connection option allowing access across different platforms when logged in under same credentials simultaneously – proceed by selecting remote connection tab located beneath profile picture icon at top left corner of each window pane respectively / alternatively enter IP address manually found within settings section of app while logged in remotely instead depending upon preference chosen during initial setup procedure through which could then make use command line function accordingly once established secure connection has been achieved between two different networks such as public wireless hotspot versus private home router etcetera… 3 ) Select file(s)/folder(
How do I transfer my Google Contacts to my computer?
Transferring your Google Contacts to your computer is a simple process and can be done in just a few steps. To begin, you will need to sign into the Gmail account associated with your contacts. Once logged in, click on “Gmail” at the top of the page and select “Contacts” from the drop-down menu. On this page, select “More” then “Export” from the options listed on the left side of the screen. You will have several export options available to choose from; it is recommended that you use either vCard format or CSV/Excel format as these are both compatible with most contact management software programs used for desktop computers. Select one of these formats and click “Export” – after a few moments, your contacts should download as an .xls file or .vcf file (depending on which option was chosen). Finally, save this file onto your local hard drive by selecting a location before clicking “Save” – once saved you can import it into any contact manager program installed on your computer for easy access whenever needed!
{“@context”:”https://schema.org”,”@type”:”FAQPage”,”mainEntity”:[{“@type”:”Question”,”name”:”How do I transfer my phone contacts to my computer?”,”acceptedAnswer”:{“@type”:”Answer”,”text”:”nnTransferring your phone contacts to a computer can be an easy and convenient way of keeping track of all your important contacts. There are a few different methods you can use, depending on the type of device you have and the operating system it runs. Below are some steps that will help you transfer your phone contacts to a computer: nn1. Connect Your Phone To Your Computer: Depending on the type of device you have, there are several ways to do this. For Apple devices, connect your iPhone or iPad to your Mac with either a USB cable or via Wi-Fi Sync; for Android phones, use a USB cable and enable u201cMedia Transferu201d mode; while Windows Phones require connecting via USB as well but must also install software such as Zune first in order for it to work properly. nn2. Backup Your Contacts: Once connected, backup any contact data stored on the phone such as address book entries, emails addresses and other information associated with each contact entry. This is necessary if you want an up-to-date version when transferring them over into another device/platform later down the line u2013 especially if they change after being transferred once already between two platforms (e.g., from iPhone -> Android). nn3 Export The Data To A Spreadsheet File Format: After backing up all relevant contact data from the device itself, export those details into either CSV (Comma Separated Values) format or XLSX (Excel file format). This will allow for much easier sorting & filtering when trying to find specific pieces of information for multiple contacts at once u2013 making it possible even without having access directly onto someoneu2019s personal mobile device! nn4 Save The Spreadsheet On Your Computer And Update As Necessary: Finally save these files onto your computer somewhere accessible so that every time there is an update made within oneu2019s address books across multiple devices/platforms (i.e., new entries added / deleted) then simply open up their spreadsheet again u2013 make any necessary changes & re-save accordinglyu2013 ensuring accuracy at all times!”}},{“@type”:”Question”,”name”:”How do I copy my contacts from my Samsung phone to my computer?”,”acceptedAnswer”:{“@type”:”Answer”,”text”:”nnCopying your contacts from your Samsung phone to a computer can be easily accomplished with the help of Samsung Smart Switch. Smart Switch is software designed to transfer data, such as photos and contacts between devices. To get started, you’ll need to download the Smart Switch app on both your Samsung phone and computer. nnOnce that’s done, here are the steps for copying your contacts: n1) On both devices, open up the Smart Switch app and select “Wireless” as the connection type. n2) On your Samsung phone, tap “Send” and then select Contacts in order to transfer them over to another device. If prompted, choose which contact account (SIM or Google/Outlook Exchange etc.) you wish to copy over. n3) On your computer now tap u201cReceiveu201d under Wireless mode within the Smart Switch application window; this will allow it detect nearby devices sending content wirelessly across networks. n4) Select which device you want to receive content from – i.e.,Your Phone u2013 by tapping its name when it appears onscreen within a few moments after step 3 above has been completed successfully . Depending upon what type of connections being used (Wi-Fi Direct or Bluetooth), an authentication code may display on one device that needs inputted into other for pairing purposes so make sure not skip these steps! Once paired correctly though all should appear fine shortly thereafter with data beginning its transfer process very quickly too if everything connected properly beforehand like expected! n5) Lastly check progress bar at top right corner monitor how far away completion still is estimated remain until finished before disconnecting either end otherwise risk losing any information yet sent but not saved onto target destination just yet due potential interruption caused premature termination before had chance finish transferring everything needed complete task entirelyu2026″}},{“@type”:”Question”,”name”:”How do I export all contacts from Android?”,”acceptedAnswer”:{“@type”:”Answer”,”text”:”nnExporting contacts from an Android device is a straightforward process that can be easily completed in just a few steps. To begin, you will need to open the Contacts app on your device and select u201cSettingsu201d from the options menu. From there, you should be able to find an option labeled u201cExport Contactsu201d where you can choose what format you would like to save them in (e.g., vCard or CSV). Once this is selected, follow any additional prompts regarding storage location and file name before tapping u201cOKu201d or u201cSaveu201d to complete the export process. Your contacts will now be saved as a single file which can then be transferred over to other devices or shared with others via email or cloud storage services such as Google Drive or Dropbox.”}},{“@type”:”Question”,”name”:”How do I backup my Google Contacts to my computer?”,”acceptedAnswer”:{“@type”:”Answer”,”text”:”nnBacking up your Google Contacts to your computer is an important way to maintain the security of your personal data in case of any unexpected events. It only takes a few steps and can be done quickly and easily. Here are the steps you should take to back up your Google Contacts: n1. Log into your Google account on the web browser of choice (e.g., Chrome, Firefox). n2. On the left side panel, click u201cContactsu201d under u201cGoogle Appsu201d section or type “contacts” in search bar at top right corner. n3. Click on More option menu located next to Create contact button and select Export from it; this will open Export contacts window where you can choose which contacts group or individual contacts need backing up before clicking on Export button given at bottom-right corner; by default all contacts will get exported if nothing is selected manually from list view shown above export button n4. Select format for file that needs saving; Google supports vCard (for single contact) & CSV (for multiple/all contact backup) formats as output options, also zip compression can be enabled if needed n5 Pick one location for file saving & click Save button once done with selecting required settings n6 All set! Your Google Contact backup has been saved successfully onto specified destination folder”}},{“@type”:”Question”,”name”:”How do I backup my Android contacts without Google?”,”acceptedAnswer”:{“@type”:”Answer”,”text”:”nnBacking up your contacts without Google on an Android device is possible and can be done in a few simple steps. Below, I will outline the steps for you to follow so that you can easily keep your contacts safe. nnSteps: n1. Open the Settings app on your Android device. n2. Select Accounts and tap u201cAdd Accountu201d from the list of options at the top of the screen. n3. Choose u201cSkypeu201d from among the available services listed under u201cAccounts & Syncu201d section and then log into Skype with your username/ password or create a new account if necessary. n4. Once logged in, select u201cContactsu201d from among other options within Skype settings menu, which should bring up all of your current contact information saved on your phone at that time. n5 . Tap Export Contacts followed by selecting either CSV (Comma Separated Values) format or VCF (vCard File). This will save a copy of all contacts to either an SD card or internal storage depending upon where you decide to export it out to.. nn By following these simple steps, you can easily back up all of your Android contacts without using Google services such as Gmail or Drive etc., giving yourself peace-of-mind knowing that they are secure and safe against any potential data loss incidents due to hardware failure or malicious activity like malware infections etc..”}},{“@type”:”Question”,”name”:”How do I transfer data from Android to PC?”,”acceptedAnswer”:{“@type”:”Answer”,”text”:”nnTransferring data from your Android device to a PC can be done quickly and easily using either a USB cable or Wi-Fi. Depending on the type of data you want to transfer, one method may be better suited for your needs than another. nnUsing USB Cable: n1) Connect the microUSB end of your cable into your Android phone. n2) Plug the other end (typically USB Type A) into an available port on your computer. n3) On your Android phone, open Settings > Storage > tap the menu icon in the top right corner and select u201cTransfer filesu201d or u201cFile Transferu201d mode. n4) Your computer should detect and recognize that it is connected to an external storage device (your Android). You will then typically see a pop up window asking what you would like to do with this connection – choose “Open folder/file explorer”. n5) If needed, open File Explorer on Windows 10 or Finder on MacOS and navigate to This PC/Computer > Removable Disk where you will find all folders stored within your Android device’s internal memory as well as any additional SD card memory if applicable. From here you can drag & drop individual files between devices or copy entire folders over if desired. Once finished copying files, safely eject the removable disk by right-clicking it in File Explorer/Finder prior to disconnecting cable from both devices. nn Using Wi-Fi: n1) Install AirDroid onto both devices – available through Google Play Store for free download & installation onto compatible Androids running OS version 4+; desktop versions are also available for Windows & macOS computers via official website at https://www.airdroid.com/en/. Be sure that both devices are connected securely to same Wi-Fi network prior proceeding further with setup steps below: tttt n2) Launch AirDroid app on both phones & computers following initial install process; log in using same account credentials (create new account if necessary). Upon successful login, you should now see two separate windows side by side each containing information about local device currently being used along with remote connection option allowing access across different platforms when logged in under same credentials simultaneously u2013 proceed by selecting remote connection tab located beneath profile picture icon at top left corner of each window pane respectively / alternatively enter IP address manually found within settings section of app while logged in remotely instead depending upon preference chosen during initial setup procedure through which could then make use command line function accordingly once established secure connection has been achieved between two different networks such as public wireless hotspot versus private home router etceterau2026 t 3 ) Select file(s)/folder(“}},{“@type”:”Question”,”name”:”How do I transfer my Google Contacts to my computer?”,”acceptedAnswer”:{“@type”:”Answer”,”text”:” nnTransferring your Google Contacts to your computer is a simple process and can be done in just a few steps. To begin, you will need to sign into the Gmail account associated with your contacts. Once logged in, click on u201cGmailu201d at the top of the page and select u201cContactsu201d from the drop-down menu. On this page, select u201cMoreu201d then u201cExportu201d from the options listed on the left side of the screen. You will have several export options available to choose from; it is recommended that you use either vCard format or CSV/Excel format as these are both compatible with most contact management software programs used for desktop computers. Select one of these formats and click u201cExportu201d u2013 after a few moments, your contacts should download as an .xls file or .vcf file (depending on which option was chosen). Finally, save this file onto your local hard drive by selecting a location before clicking u201cSaveu201d – once saved you can import it into any contact manager program installed on your computer for easy access whenever needed!”}}]}